
March 31st is World Backup Day. With so much of our lives, photos, and videos being stored in digital form, it is important to make backups of our precious data. Backing up your data is one of those easy-to-do procedures that many people ignore.
Disclosure: Apple Tech Talk participates in various affiliate marketing programs and may receive compensation if you purchase a product through one of our links, and/or in the form of product donations from the companies whose products we review . Unless otherwise specifically stated, Apple Tech Talk does not receive any other compensation for its reviews. The opinions expressed are based solely on our independent testing, are our own and are not shared with anyone prior to release on our site.
We are creating data at a feverish pace. By some estimates, 90% of all data has been created in the last two years. Just consider some of the data created and used every minute, as reported in Domo.com, Data Never Sleeps 6.0 report.
- Netflix users stream 97,222 hours of video
- YouTube users watch 4,333,560 videos
- Twitter users send 473,400 tweets
- We send 12,986,111 text messages
- Americans use 3,138,420 GB of Internet data
A lot of the data that we send to others, download for reference or receive from someone else gets retained on our own computers and hard drives. Unfortunately, nearly 30% of people have never even backed up their data.
There are two type of computer users in the world. Those that had a hard drive failure, and those that will have a hard drive failure. Regardless of which group you are in, hopefully, you already have a comprehensive backup strategy in place.
Regardless of how careful you are, no one is immune from hard drive failures. We have had multiple instances of hard drive failures, due to power surges, mechanical failures of an older drive and even an external drive accidentally being dropped.
It can’t be said often enough, any data that you have, that you don’t want lost, should never be in just one place.
In the early days of personal computers, backups were simple. All of your data was on your computer and people could back it up to floppy disks, CDs and finally DVDs. But things are more complicated today. The amount of data we have is constantly growing. File sizes are getting bigger and our data lives in multiple places, even within our own homes.
With all these components to consider, it’s difficult to find one solution to meet every need. So here are some suggestions on putting together a comprehensive backup strategy.
The 3-2-1 Backup Strategy
There is no one perfect backup strategy and what works for one person may not be good for someone else. But the 3-2-1 Backup Strategy is widely thought to be a basic principal that everyone should start with. In a 2012 paper for US-CERT (United States Computer Emergency Readiness Team), Carnegie Mellon recommended the 3-2-1 method in their publication titled: Data Backup Options.
A 3-2-1 strategy means:
- 3 – Keep 3 copies of any important file: 1 primary and 2 backups.
- 2 – Keep the files on 2 different media types (devices) to protect against different types of hazards.
- 1 – Store 1 copy offsite (e.g., outside your home or business facility).
This may sound like a lot and depending on the data you are working with we would even suggest that you may be able to take some shortcuts, but the basic principles apply and are worth your consideration.
Time Machine
For most people, the most important data you have lives on your Mac. It is by far, the most current information and, we suspect, the most critical. Whether it’s your iTunes library, Photos or your Calendar and Contacts, it’s the data you need to recover most quickly and completely. Fortunately, the Time Machine utility makes protecting that data very easy.
When Apple introduced Time Machine, it was estimated that only 4% of Mac users were regularly backing up their computers. With Time Machine now included in OS X, all you needed to do was add an external hard drive and your data would be fully protected.
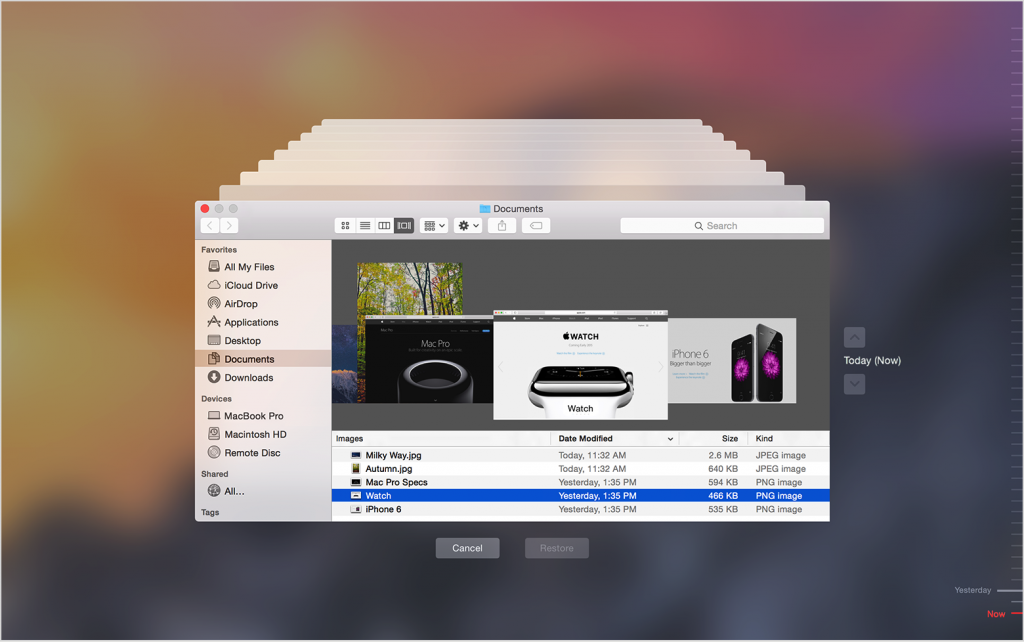
One of the things that made Time Machine different from other backup utilities at the time was its ability to not only back up your data, but also allow you to go back in time and recover old files that may have accidently been deleted in the past. Time Machine takes an hourly snapshot of your computer and records any changes you’ve made since the last backup. At the end of the day, those hourly backups are rolled into a daily backup. The daily backups become weekly backups and finally monthly backups.
It is recommended that the Time Machine hard drive be at least twice as large as the hard drive you are backing up. The larger the hard drive, the farther back in time you can go. With the cost of external hard drives getting cheaper every day, you can easily go back a year or more to find a lost file.
We have a 1TB hard drive attached to each of our Macs at all times, except if we are mobile with our laptops, and consider them to be our first backup.
As good as Time Machine is, it is not without its issues.
While you can use your Time Machine drive to restore a new hard drive or a new computer, it can take a while. We have used our Time Machine drives when upgrading to a new Mac and it took several hours before the machine was ready to use. But the bigger concern is that a Mac cannot use a Time Machine drive as a Start-Up Disk. That means you would still need a Mac with a working version of OSX before you could even consider getting to your data. And plugging your Time Machine drive into someone else’s Mac will cause a whole host of issues both for you and the Mac owner since the data on the Time Machine drive no longer matches the data on the computer.
Bootable Clone 1
In addition to your Time Machine hard drive, we recommend making a bootable clone of your Mac.
A bootable clone is an exact duplicate of the hard drive in your Mac at the time you make the backup. The software adds the files necessary to allow he external hard drive to actually start up and run your Mac. The hard drive is completely self-contained. That means that starting any Mac from your bootable drives, turns that Mac into “your” Mac, but without making any changes to the hardware owner’s own files.
The other thing is that using a bootable clone gets you up and running almost immediately. While an external drive is a little slower than the internal drive in your Mac, it allows you to continue working in minutes, rather than hours.
Finally, since any new work you due while using the clone is saved to the clone, you can “clone” the external drive back you your own Mac once the hardware is repaired or replaced and have all the changes back on your own computer.
If you search the web, you’ll find several choices for cloning software, but our favorites are Carbon Copy Cloner by Bombich Software (available here), and SuperDuper! By Shirt Pocket Software (available here).
Over the years we have used both products and it’s hard to say one is better than the other. There are some minor differences between them but they are both great products.
SuperDuper! has a free version available but it comes with some important features restricted. Carbon Copy Cloner offers an unrestricted 30-day free trial. Our suggestion is to try them both and decide which one you like best.
Once you pick your software you will need another external hard drive at least as big as the hard drive in your Mac. Use the software to make a bootable clone of your Mac’s hard drive. If you want to save a few dollars, you can buy one drive significantly larger than your Mac’s hard drive and create two partitions. Use one partition for your Time Machine drive and one for your bootable clone. Never mix the bootable clone and the Time machine files on the same drive partition.
We do not recommend using one drive, but it is an option. That said, if you have more than one Mac in your house, you could use a single drive to store multiple bootable clones. Again, if you plan to do this, make a separate partition for every clone on the drive.
We have an individual hard drive for each of our Macs and refresh the backup one a month (usually on or about the first of the month. Although the first time you make a clone it could take a couple of hours (depending on the size of your hard drive) the subsequent updates are fairly quick. We can usually refresh the clone in under 20 minutes but since it takes care of itself, we can go off and do other things while the program is running.
The bootable clone is our second backup.
When the clones are complete, we keep the hard drives on-site but in a different room from where the computer is kept. This reduces the risk of having the Mac, Time Machine drive and the bootable clone all being lost in the event of a minor disaster that impacts only a portion of the building. If you have a fireproof safe in your house for your valuables, think about keeping your bootable drives there.
Bootable Clone 2
If our backup strategy ended here, we are facing two issues. First, since all of our backups are in the same location, a catastrophic loss to the building would leave us with no way to recover our data since the Mac, the Time Machine drive and the bootable clone would all be gone.
The other issue is, since we do a clone once a month, even if we could recover the bootable clone, it potentially looks very different than the Mac did if it is towards the end of the month. Since we may not have the Time machine drive to recover more current files, there could still be a loss of important data.
To address both these issues, we use another hard drive with multiple partitions to make another clone of our Macs around the 15th of each month. With today’s larger hard drives, you can easily fit 3 or 4 clones on a single drive. We can do all of our backups in a couple of hours and the next morning we take the drive to a different location (perhaps your office or a nearby relative’s house) for safe keeping. A month later, we bring it back and refresh it.
This is our third backup.
Using the schedule, we are actually doing a full clone of our computer every two weeks so under most situations, our ability to recover a complete recent image of our computers is fairly good.
Some people consider leaving the off-site clone drive in their car. We don’t recommend this. Temperatures in a car can get pretty extreme and long term exposure to dramatic heat or cold could damage the drive and your data. The only thing worse than not having a backup is having a backup and finding out, when you need it, it doesn’t work.
To prevent that surprise, we regularly test our backups. We
periodically activate Time Machine to ensure that it opens properly, and we can
see the historical data as well as navigate to a prior data and file.
For our clones, we will actually boot our Macs from he external hard drive to make sure the Mac does start up and all of the applications and data we expect is visible.
It’s been suggested that off-site drives be kept in a local bank’s safe deposit box. This is a personal decision but again, we don’t recommend it. Access to a safe deposit box is complicated and not always available. If you need to get to your remote drive in the evening or on a day when the bank is closed, you’re out of luck. We think you should keep the drive off site but easily available 24 x 7 if you need it.
Backup Strategy Costs
This may all sound complicated and expensive so let’s run the numbers. If you have 2 Mac (maybe an iMac and a MacBook Air), each with a 500GB internal hard drive, in your house and wanted to apply our 3-2-1 backup strategy, what would you need and what would it cost?
The Time Machine software is built in to Mac OS so that’s free
There is a slight difference in the cost of Carbon Copy Cloner and SuperDuper!. Carbon Copy Cloner is slightly more expensive at $39.99 but one copy can be used on every Mac in your house. SuperDuper! Is intended to be used by a single user but if you own and “use” more than one Mac, you are permitted to install the same copy of SuperDuper! on each Mac you own. The folks at Shirt Pocket Software rely on the honor system so do the right thing. For purposes of this exercise, we’ll use the higher priced Carbon Copy Cloner at $39.99.
Each MacBook should have a dedicated external hard drive for Time Machine. Since the internal hard drive is 500GB, the smallest external hard drives you should use is 1TB like the WD My Passport or the Seagate Portable. To make a bootable clone you could get the same drive in a 500GB model but the difference in cost is minimal (approximately $5.00) so we suggest getting four of the 1TB drives, available from Amazon using the links above. Total cost for the four drives, $236.00. To make the second clone for off-site storage you could get a 2TB version of these drives and partition it so both Macs can be put on the same drive. We like that these drives are available in different colors and would also suggest you consider ordering them help keep track of which drives are for what (black drives for Time Machine, Blue drives for on-site clones and Red Drive for off-site clones).
For added security, consider using an encrypted hard drive for those copies that will be stored off site. That way, even if someone happens to get possession of your hard drive, they will not be able to read the data on it. We previously reviewed the iStorage diskAshure drives (read our review here). Admittedly, they are more expensive than a regular hard drive but the ability to ensure no one can access your personal data is priceless and think we they are a perfect solution for any data security concerns.
| Item | Cost |
| Time Machine | Free |
| Carbon Copy Cloner or SuperDuper! | $ 39.99 |
| 4 – 1TB WD My Passport Ultra Drives | $236.00 |
| 1 – 2TB WD My Passport Ultra Drive | $ 89.00 |
| Total | $364.99 |
For just less than a dollar a day you can have a robust backup strategy that will last for years. Now think about this. Assuming you had to repurchase all of the music in your iTunes library, including all the old CDs you’ve ripped over the years, and could pay a photographer to retake all the family pictures stored in Photos, and recreate all of the letters, bill copies, legal documents, etc., that are currently stored on your computer, how much would it cost? Now consider that you really can’t recreate or replace and try to put a value on all of those important items and memories. Now ask yourself, what is it all worth? We’re sure it’s a lot more than $364.99.
The Bottom Line
A 3-2-1 Backup Strategy is what most experts agree is where you want to get to and maybe you need some time to get there. That’s fine. Start slowly but start today. If you’re not already using Time Machine, get an external hard drive and get it set up. If you are using Time Machine, add a bootable clone to your backup plan and perhaps, do a clone more often until you can add a second clone to the program.
Remember, there are two types of computer users in the world. Those that have a backup strategy in place, and those that need to put one in place.
What kind of backup strategy do you use? Are there other devices you have that need data backed up? What are they and how do you address them? We would love to hear from you.
Why not join the conversation and leave us a comment below.
If you liked this article, please consider sharing it with your friends and leaving a comment below. Also, don’t forget to “Like” us on Facebook, “Follow Us” on Twitter and add the Apple Tech Talk channel to your Apple News app.
Apple Tech Talker
THIS IS A RE-POST OF THIS ARTICLE WHICH LAST APPEARED ON OUR SITE ON MARCH 28, 2018. SOME CONTENT HAS BEEN ADDED AND/OR UPDATED FROM THE PREVIOUS ARTICLE.

Leave a Comment
You must be logged in to post a comment.