
Back in May, we told you about the release of the new Synology RT6600ax Wi-Fi 6 Router (read the announcement here). The folks at Synology sent us a unit to test, and like all of the other Synology products we have reviewed, this new router did not disappoint.
Disclosure: Apple Tech Talk participates in various affiliate marketing programs and may receive compensation if you purchase a product through one of our links, and/or in the form of product donations from the companies whose products we review . Unless otherwise specifically stated, Apple Tech Talk does not receive any other compensation for its reviews. The opinions expressed are based solely on our independent testing, are our own and are not shared with anyone prior to release on our site.
Apple Tech Talk Scorecard
| Pros | Cons |
| Easy set-up | None |
| Strong performance |
Synology RT6600ax Wi-Fi 6 Router – Unboxing
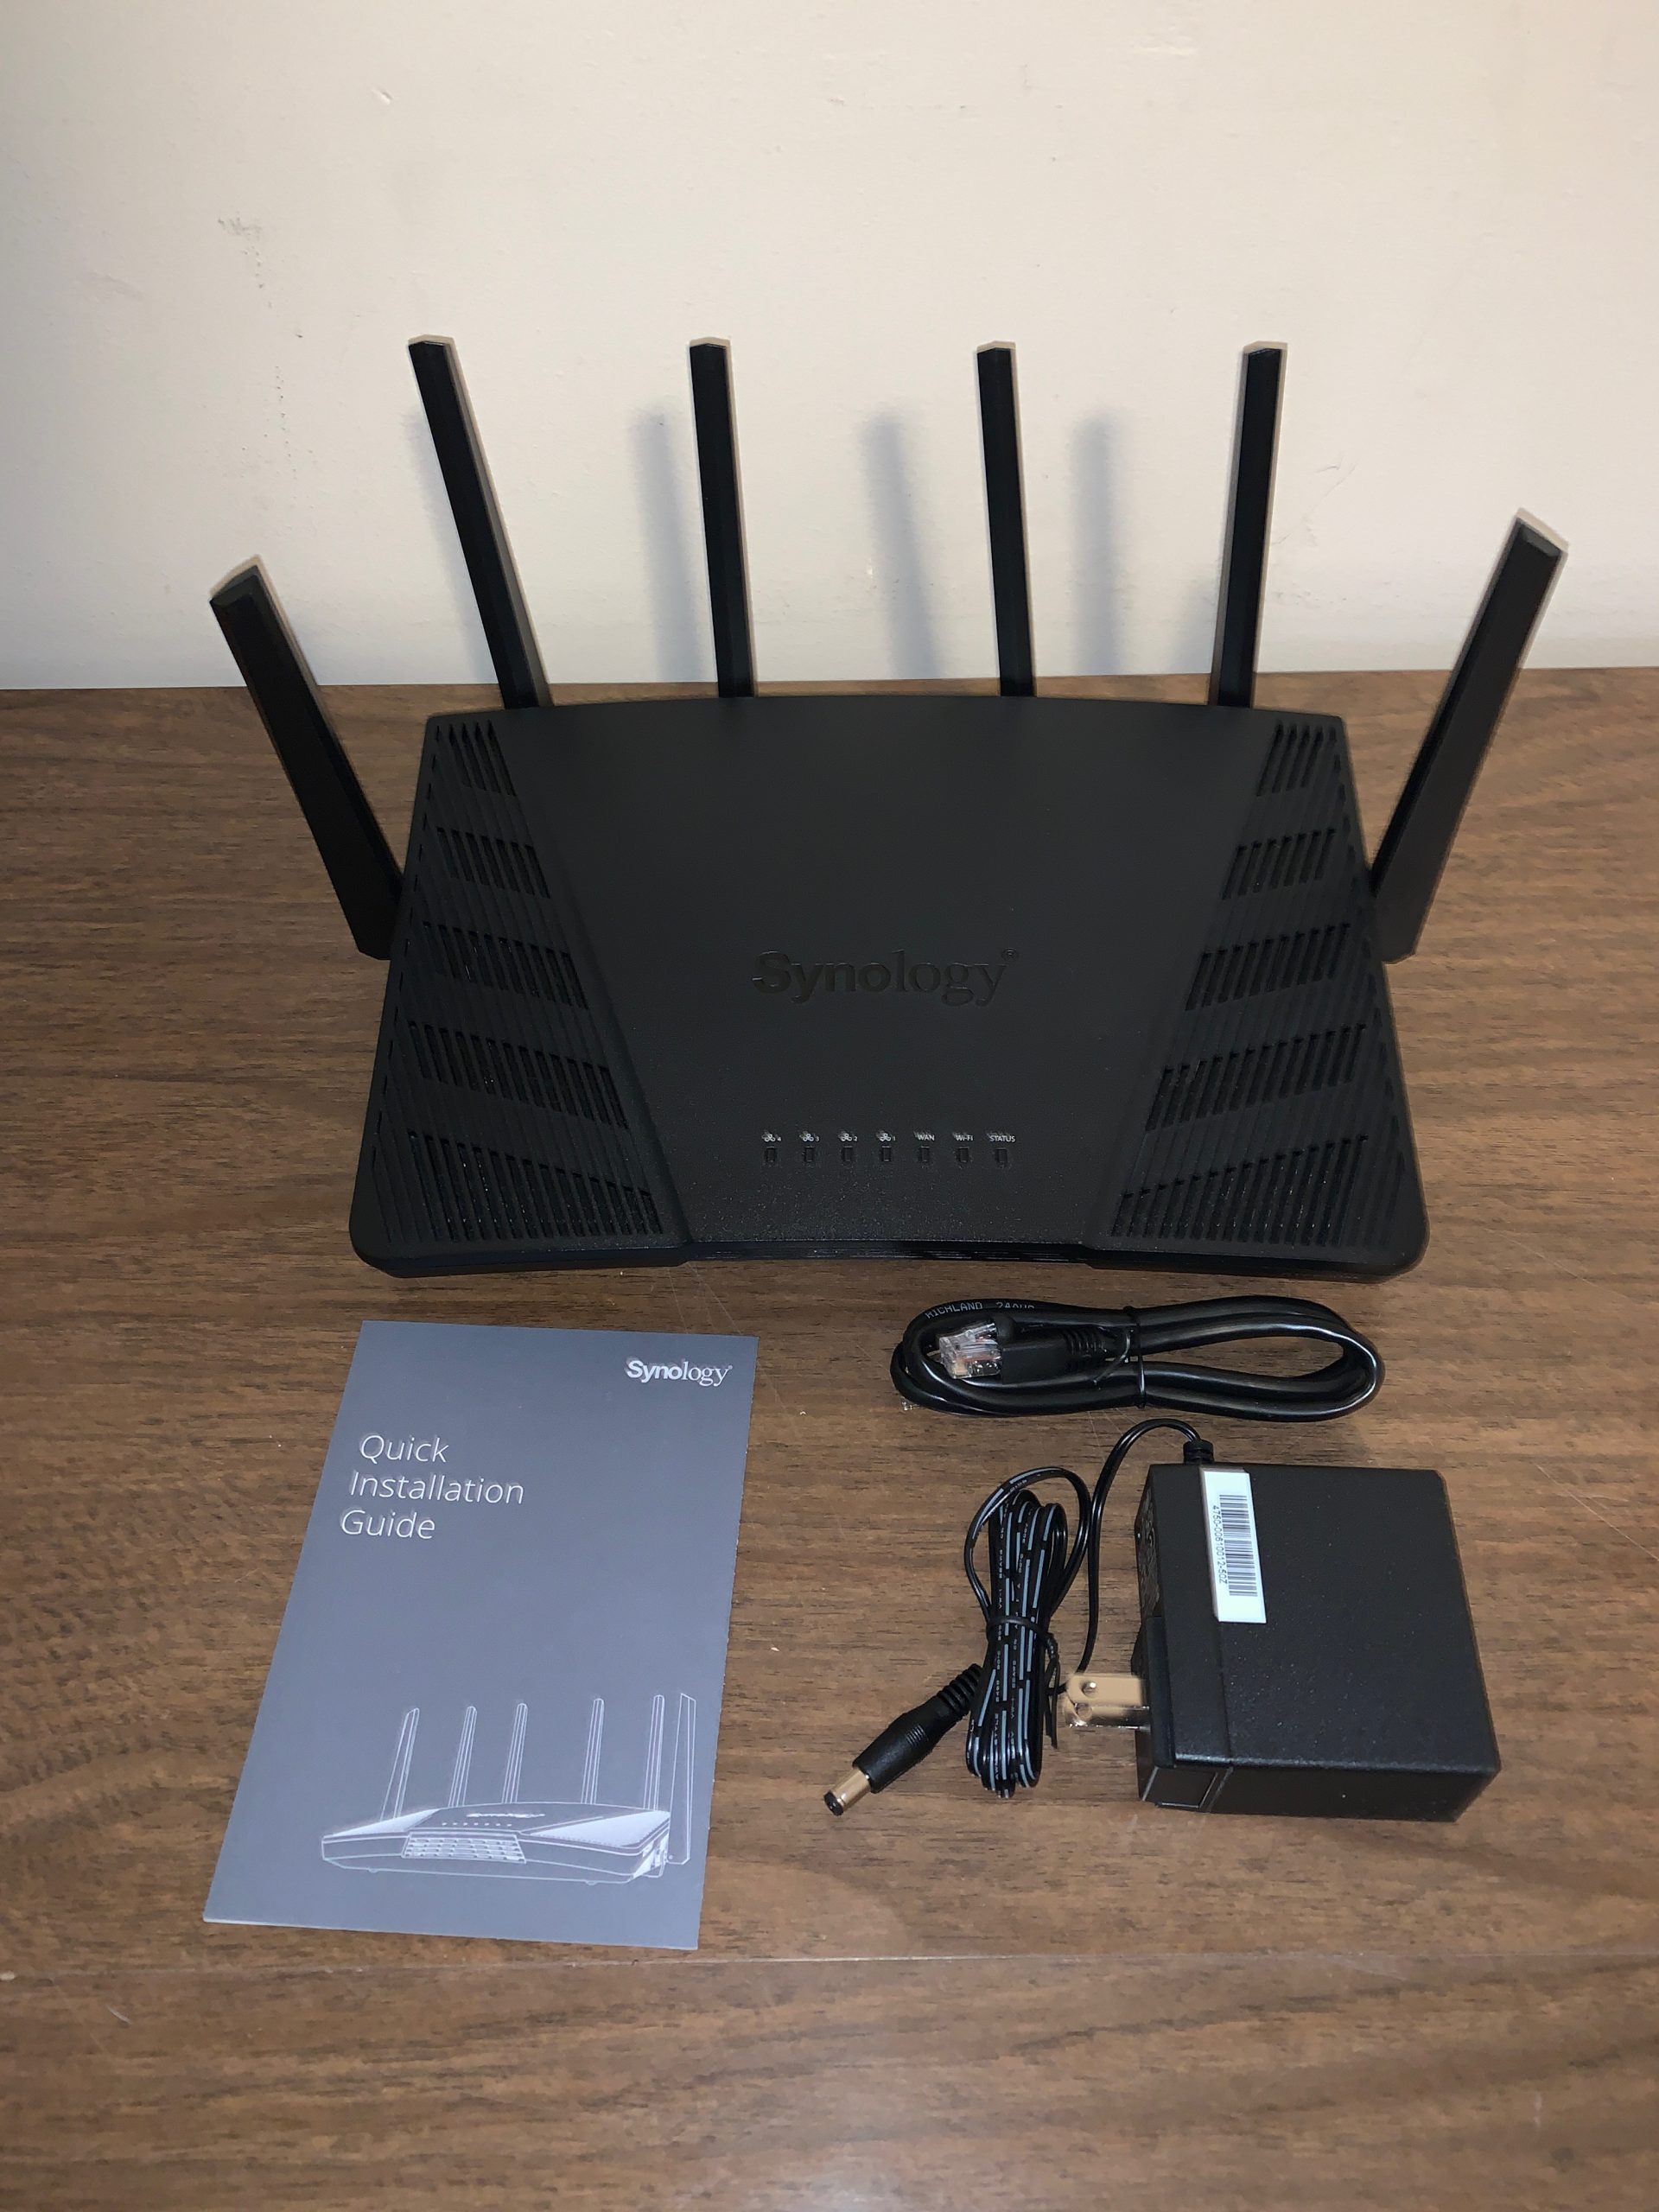
In the box is the Synology RT6600ax Wi-Fi 6 Router, a 110V/240V US power supply with a removable plug to allow for other country’s plugs, an Ethernet cable and a Quick Installation Guide.
The router measures 6.9” wide x 12.6” long x 7.8” high, with the antenna fully extended (175mm x 320mm x 200mm), and weighs 3.5lbs (1.6kg).
The router has six (6) built-in antennas, 4 x 4 MIMO Omni-directional high-gain dipole (5GHz) and 2 x 2 MIMO Omni-directional high-gain dipole (2.4GHz / 5GHz). While the antennas are fully adjustable, we were surprised to see that they are permanently attached to the router, unlike the antennas on the Synology RT2600ac which screw on to the body.
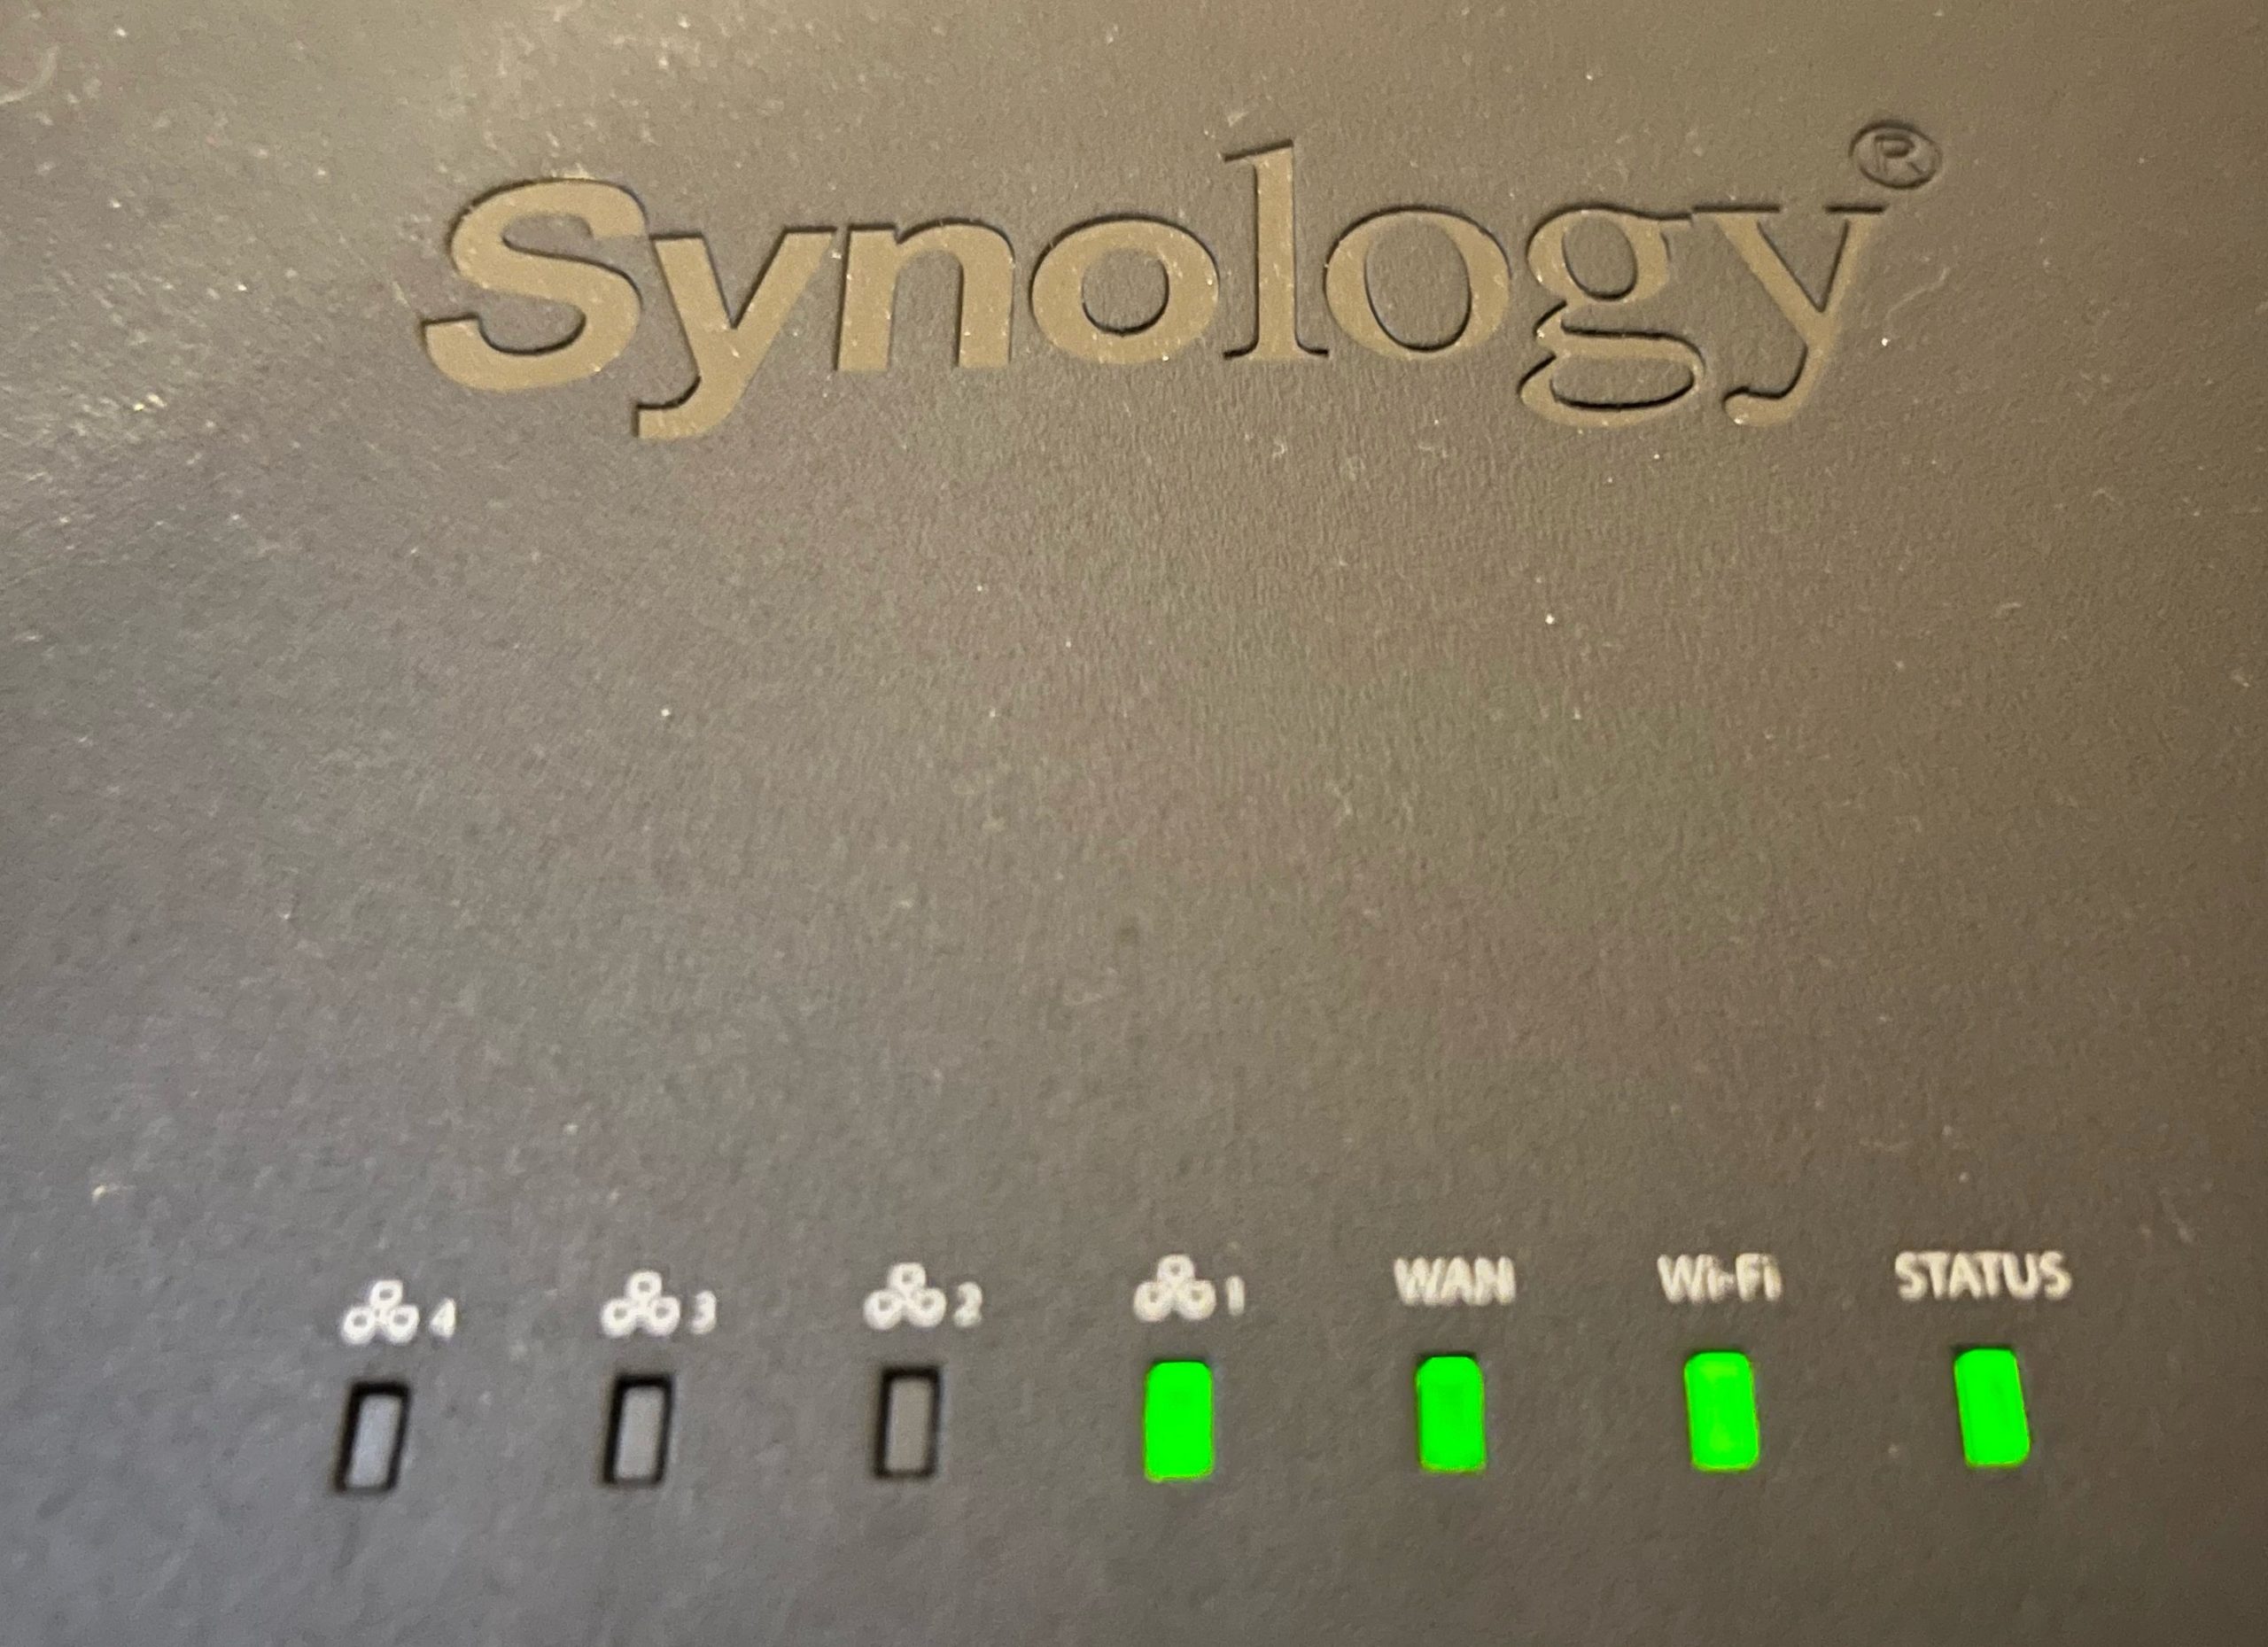
On the front are seven (7) LED indicators, One for the Wi-Fi status, one for router status, one to verify a WAN connection, and 4 which correspond to the LAN ports.
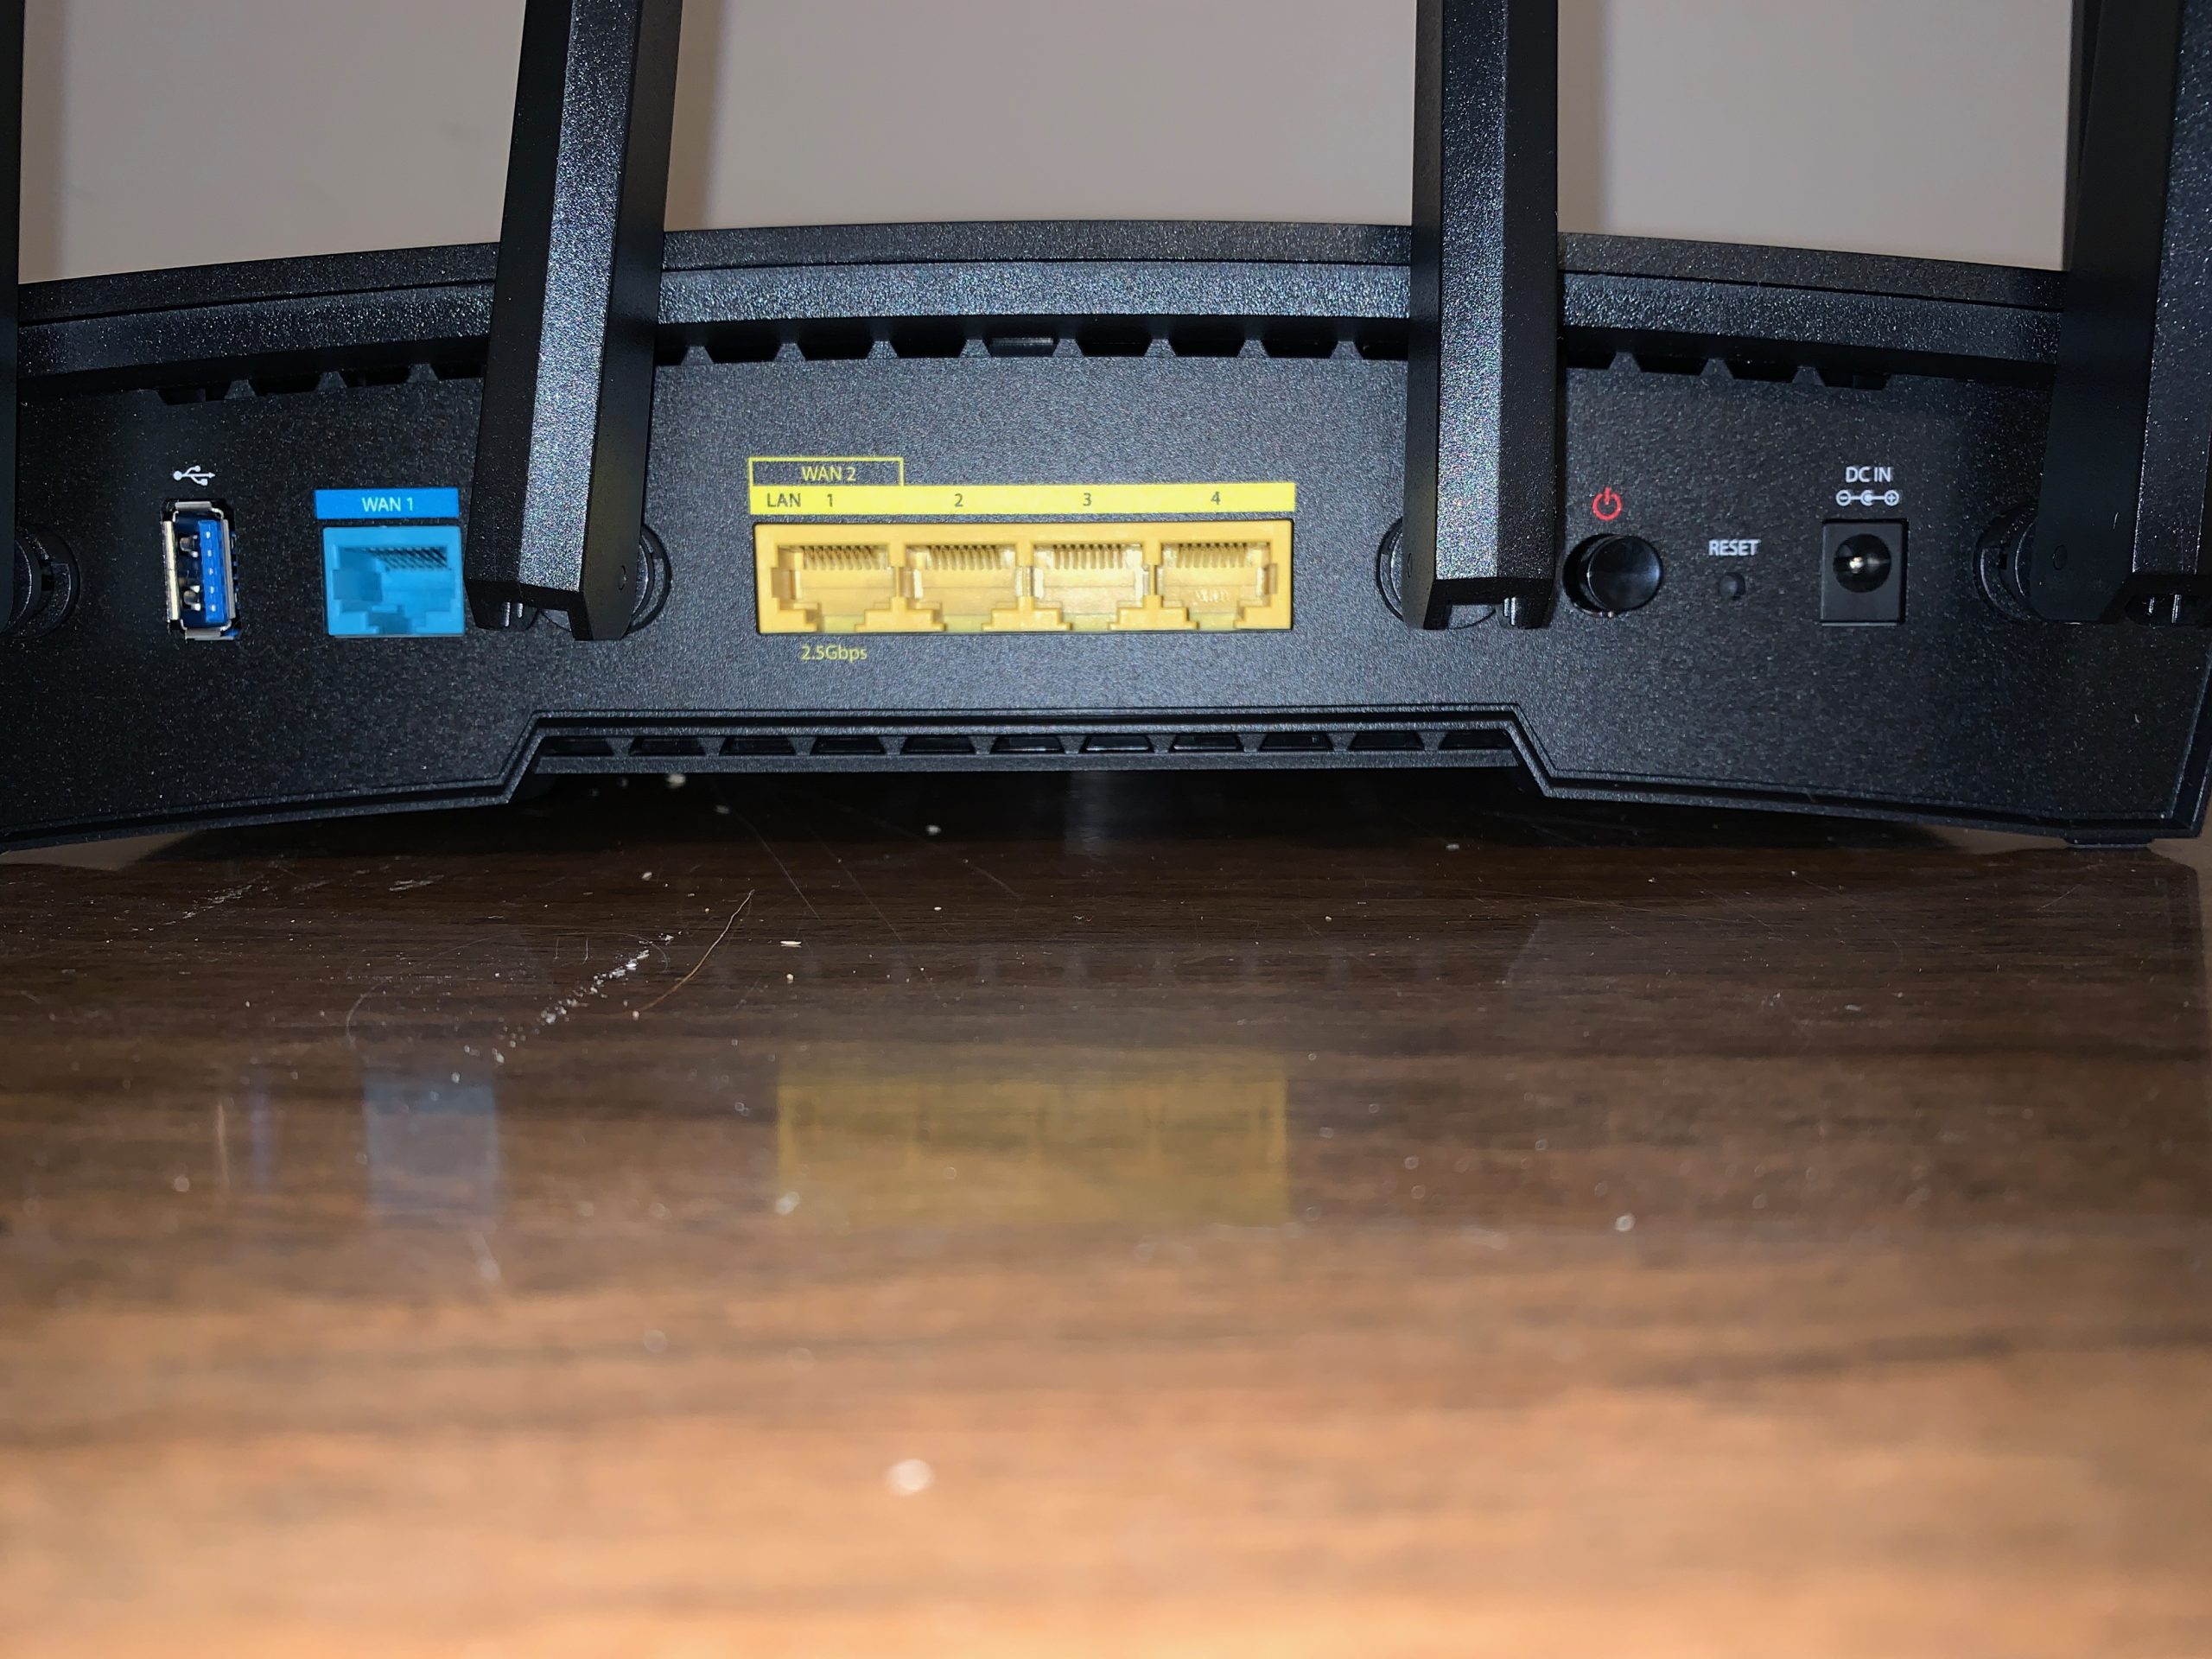
On the rear of the router (starting on the left side), is a USB 3.2 Gen 1 port which provides 5V, 0.9A power output, to accommodate an external drive or networked printer, a connection for your modem or optical network interface (WAN), four LAN ports, which correspond to the front LEDs, a power button, a rest button and the power outlet.
The #1 Lan port is a 2.5GbE which can be set up as a dual LAN port. The other three are Gigabit ports.
On the side of the router is a WPS button, and a button to turn Wi-Fi off and on.
Synology RT6600ax Wi-Fi 6 Router – Other Specifications
The Synology RT6600ax Wi-Fi 6 Router is powered by a Quad core 1.8 GHz chip and has 1GB of DDR3 memory.
The router supports IEEE 802.11a/b/g/n/ac/ax with simultaneous tri-band Wi-Fi of 5GHz-1: 4800Mbps, 5GHz-2: 1200Mbps and 2.4GHz: 600Mbps.
Just about every level of Wi-Fi encryption is supported including, WPA/WPA2-Personal, WPA/WPA2-Enterprise, WPA2/WPA3-Personal, WPA3-Personal/Enterprise, Wi-Fi Enhanced Open (OWE)
Synology RT6600ax Wi-Fi 6 Router – Set-up
Like all of the Synology products we have reviewed, we are always impressed with how easy the set-up process is. While we are going to review it here, you should also check out our review of the Synology RT2600ac Router which also covered the set-up process, (read that review here).
With the router connected to your modem and powered on, you open a browser and enter, http://router.synology.com, or the default router address, http://192.168.1.1.
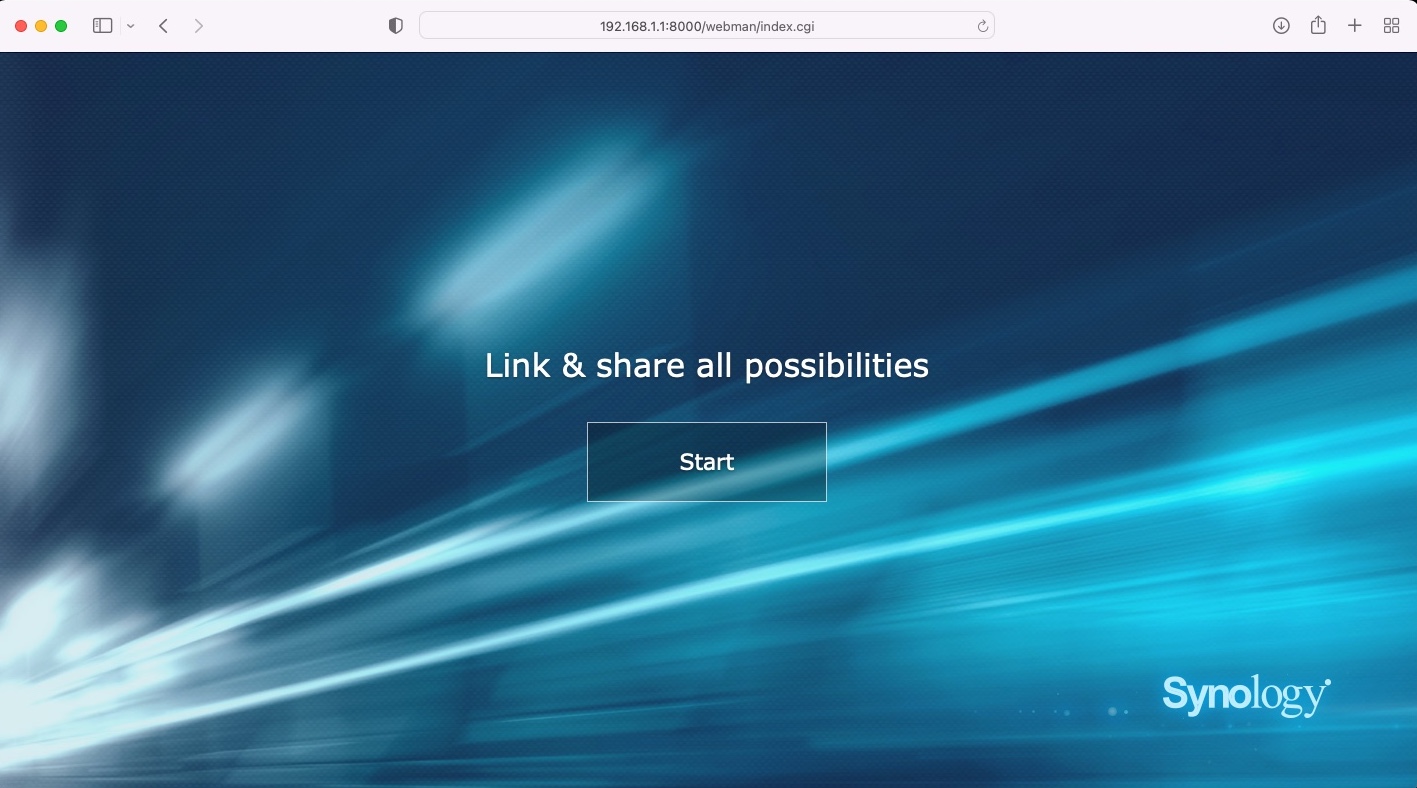
Like magic, a connection is made to the RT6600ax and you are presented with a Start screen. Clicking the Start button launches the SRM (Synology Router Manager) set-up wizard.

Next, you are asked to create an Administrator Account for the SRM software. While the Synology RT6600ax Wi-Fi 6 Router has a default admin account, we like that Synology forces you to create a new administrator for the device and then deactivates the default account. This goes a long way in protecting your device and network from unauthorized intrusion.
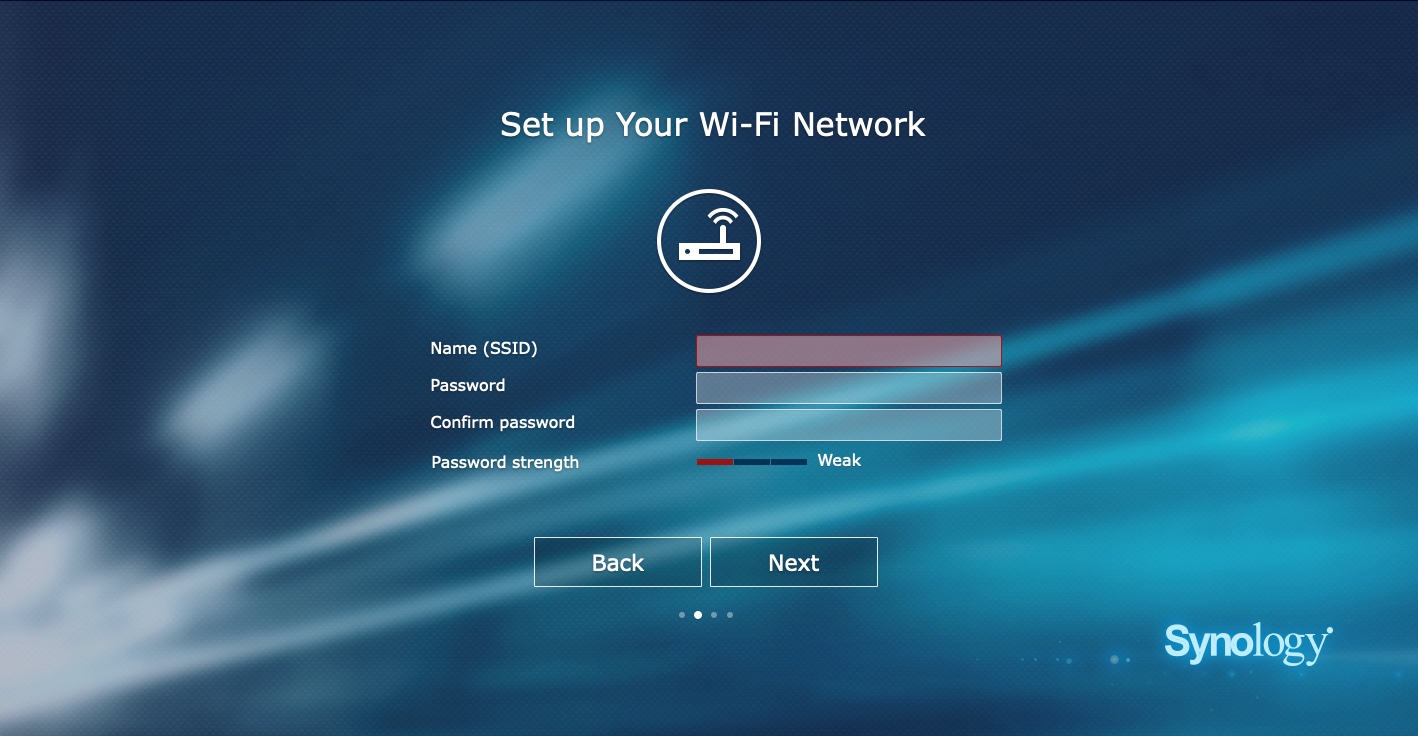
Next, you are asked to set up your Wi-Fi network. If you are replacing an existing router and already have a network name (SSID) and password, this is where you enter that information. If this is a new network, select a name that will be easily recognizable to you as well as a strong password to protect it.

Finally, you need to select if the router will act as a wireless router or an access point to an existing network. In most cases, we think you will select the wireless router option. There is also an option to allow remote access to SRM. Unless there is a true need to access the SRM software remotely, we suggest you leave this disabled for better security.
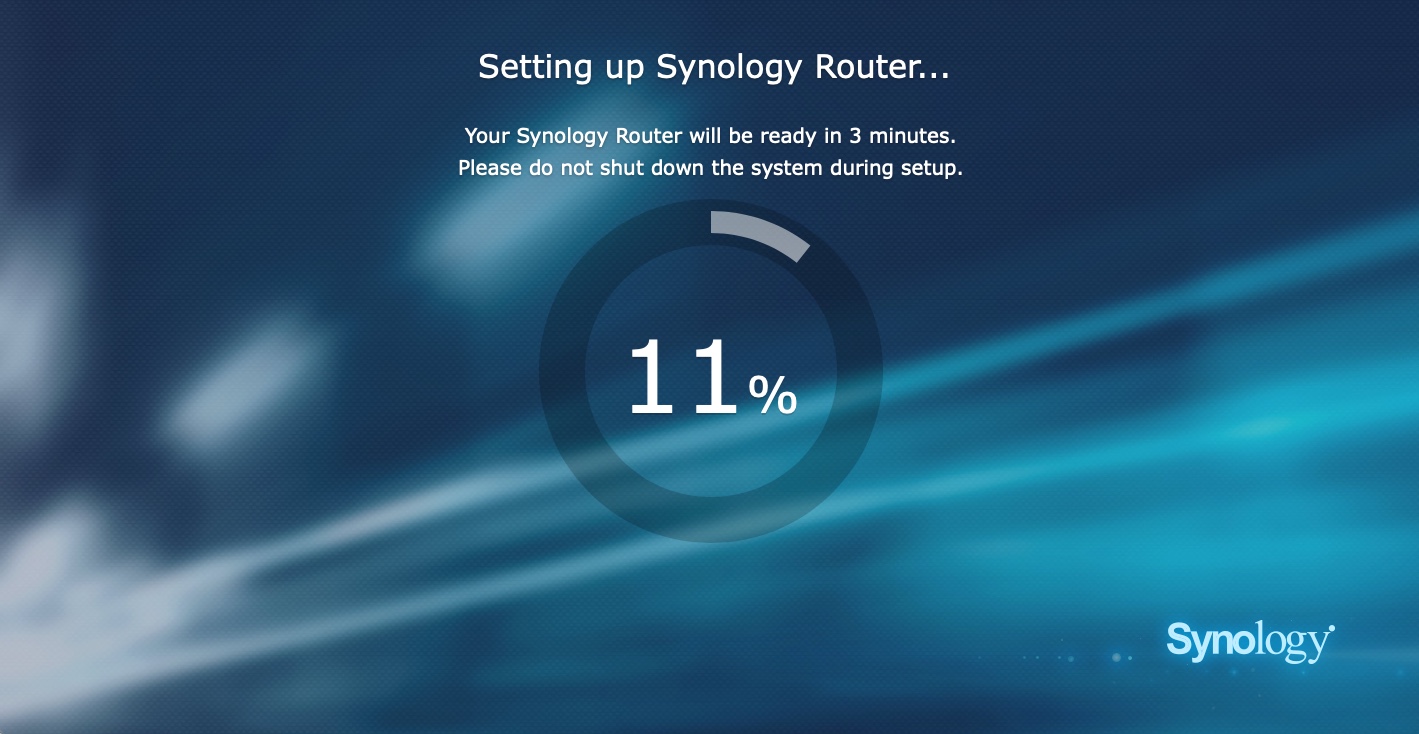
With all of the selections made, the set-up wizard will begin the work of setting up your Wi-Fi network, creating the new administrator account, and doing all of the necessary router configurations. The actual network set-up takes only a couple of minutes. Start to finish, it took about 15 minutes to unpack the router, get it powered up and run the set-up wizard.
Synology RT6600ax Wi-Fi 6 Router – Post Set-up Adjustments
For most users, your set-up is now complete. But because of the design of our network, we had a little extra work to do. Fortunately, SRM makes these adjustments quick and easy.
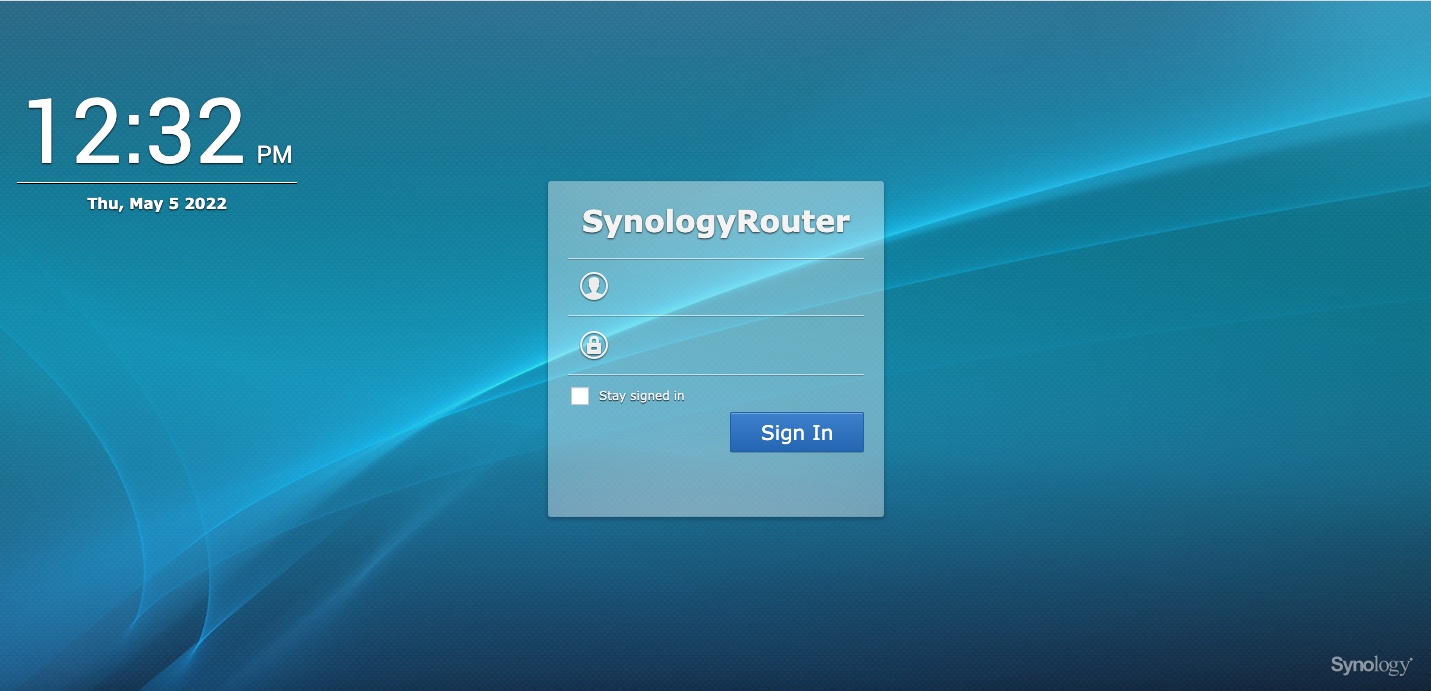
The first step is to log into SRM. To get to the log-in screen, open a browser and use the same options used when you were setting up the system. Then use the User Name and Password for the administrator ID you created during the set-up.
For most people, you receive an IP address from your service provider. From time to time, that address may change but it goes unnoticed as the router automatically negotiate the new address seamlessly.
In our case, because we need to be able to connect with devices inside our network, we need to always know the providers IP address and ensure it doesn’t change. This is known as a static IP address.

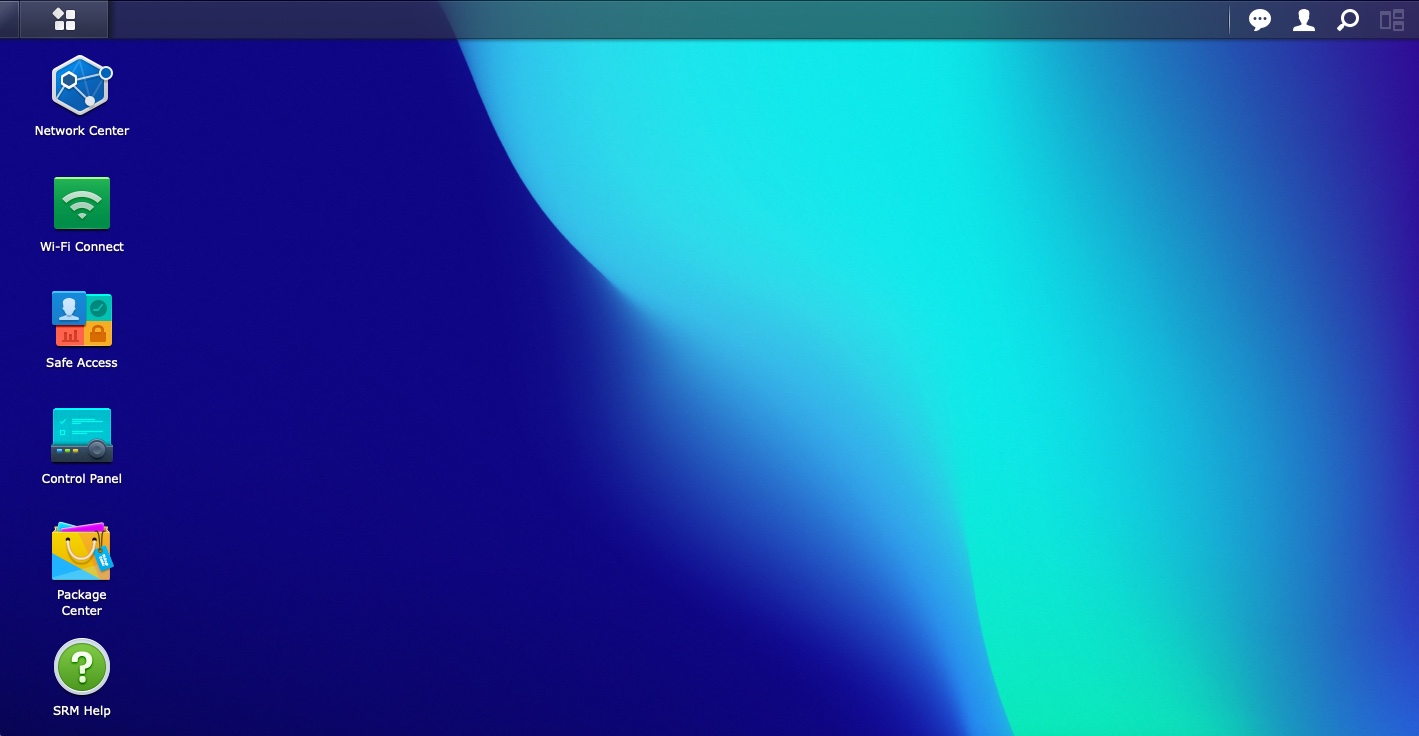
To set up a static IP address, you just need to open the Network Center on the main SRM screen. Select Internet on the side bar, and then change the Connection Type to Manual. You can then enter all of the needed information such as IP address, Subnet, Gateway and DNS server. If you have a static IP address, your service provider can give you all of this information.
If you recall, when we first set up the router, one of the ways we were able to connect was to enter the Local IP address in the browser address bar. That address, 192.168.1.1, has become somewhat of an industry standard for default router local addresses. For most people, they just keep that address and let the router do the work.
In our case, we built our first wireless network using an Apple Airport Router. Like most things Apple, they were different and used their own default local IP address of 10.0.1.1. Over the years, as we added more and more devices to our network, we assigned static address to some of those devices. As a result, using a router with a 192.168.1.1 address would not allow us to connect to many of our devices.
Fortunately, this is a simple fix.
The final step is to set the DHCP range for your local network which allows the router to assign IP addresses to all connected devices, as well as recognize any devices that had a specific IP address assigned to it.
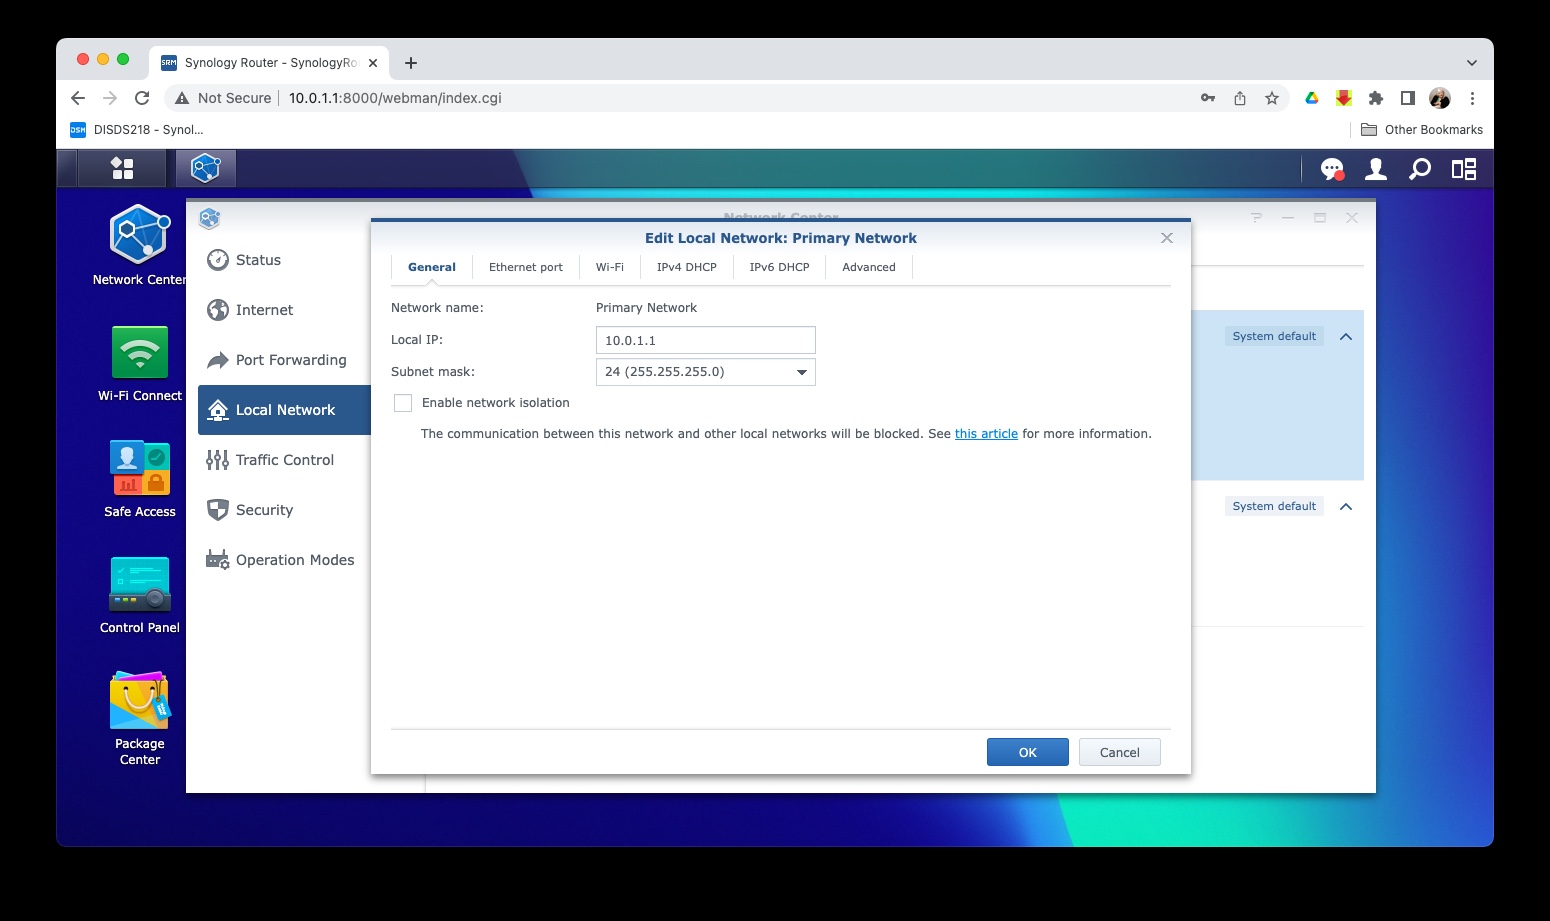
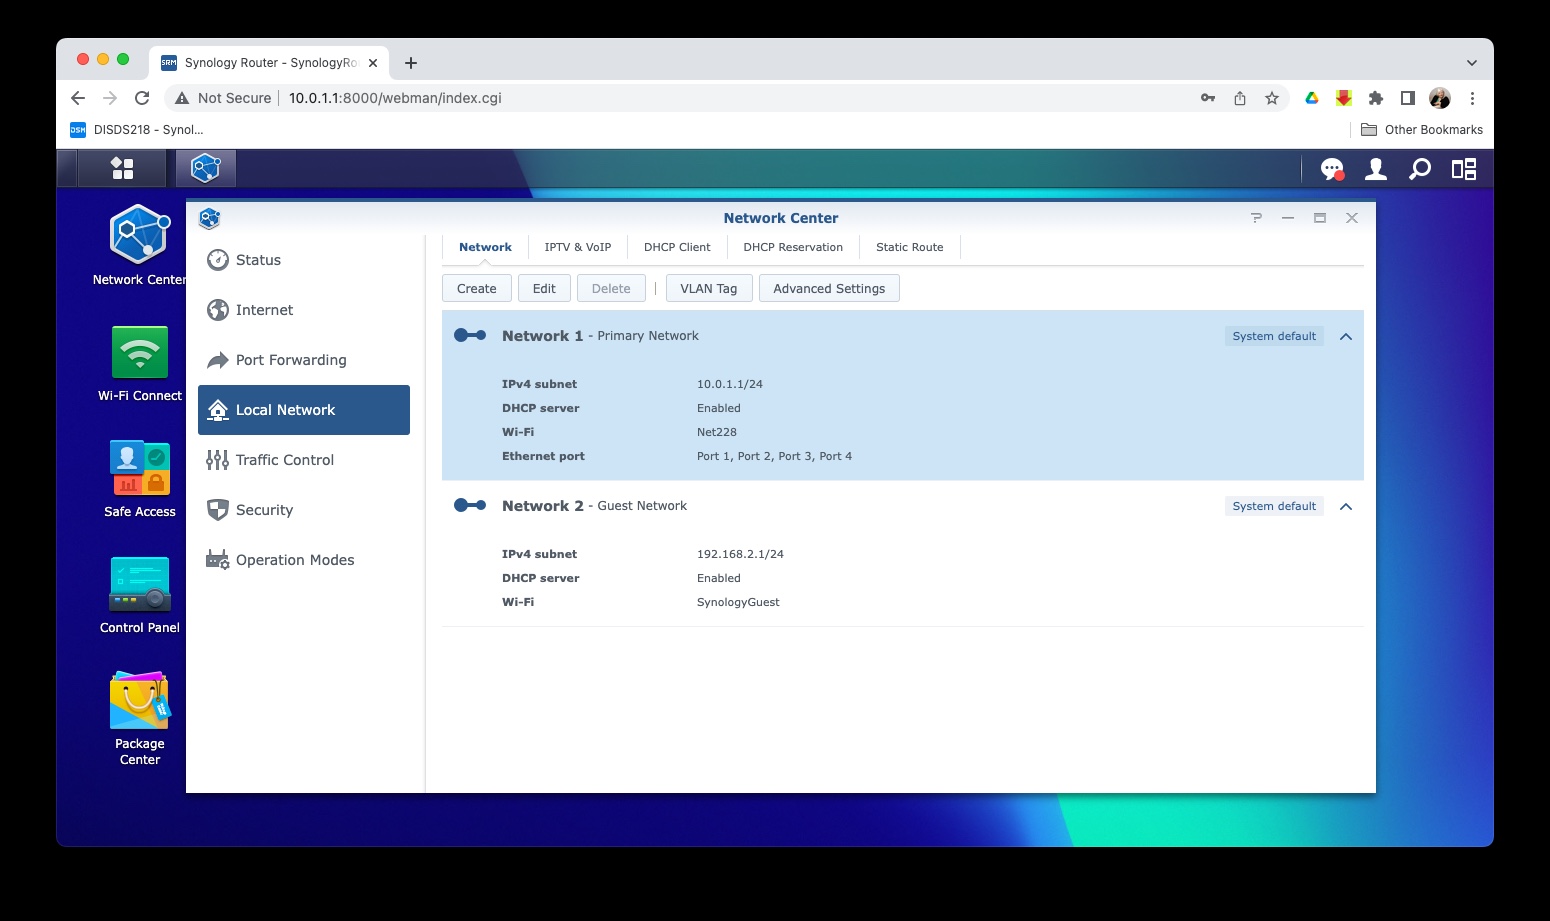
While still in Network Center, click on Local Network. Select Network 1 and click the Edit button. That will bring you to the Primary Network Settings screen where you can enter the new local IP address.
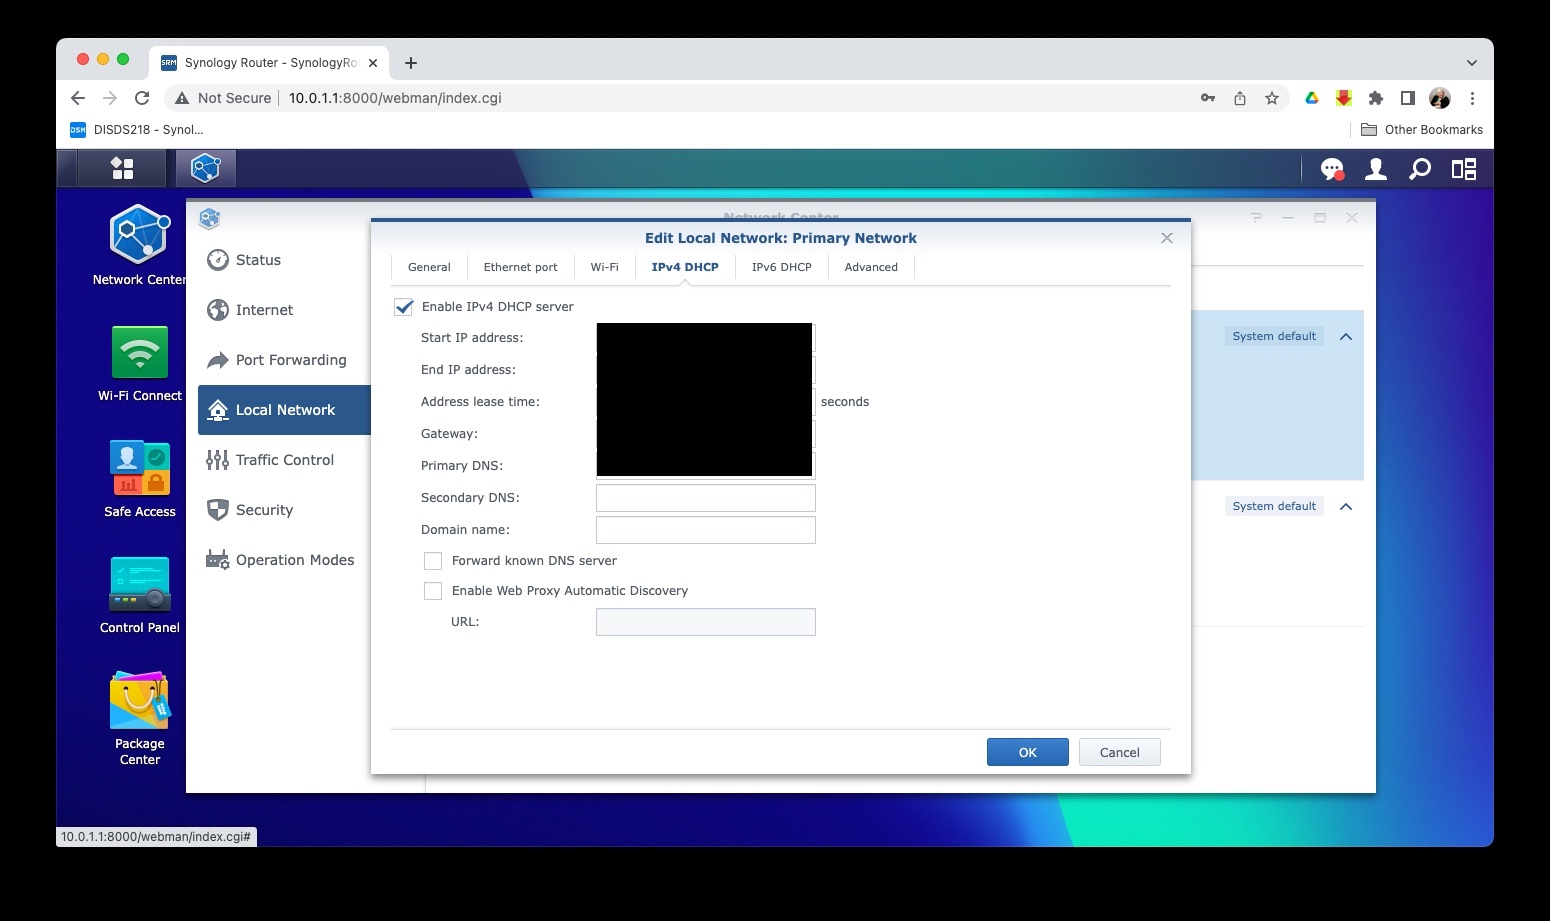
To do that, while still in the Primary Network tab, click on the IPv4 DHCP tab and set the desired range to be assigned to devices.
Once you save all of your settings, the setup is complete.
Synology RT6600ax Wi-Fi 6 Router – Test Results
Of course, it doesn’t matter how easy the set-up process is or how well designed the router management software is if the router doesn’t perform well. In this case the Synology AT6600ax Wi-Fi 6 Router not only performed well, but it exceeded our expectations.
We set up the Synology RT6600ax Wi-Fi 6 Router in a 2,200 sq. ft. raised ranch style house. The modem is located on the lower level at one end of the house, and the network devices are scattered in numerous locations on both levels, including an office on the upper level at the opposite end of the house, as well as several TVs that stream content, a private server for file sharing and media hub and even a couple of devices outside the house in various locations on the property.
In order to get a stable connection for everything, we use a Wi-Fi Mesh system with a router at one end of the house on the lower level, one additional satellite unit on the upper level, at the opposite end of the house and a Wi-Fi Extender, also on the upper level, to handle the outdoor devices..
To test the Synology RT6600ax Wi-Fi 6 Router, we disconnected the entire mesh network as well as the Wi-Fi Extender and connected the Synology RT6600ax Wi-Fi 6 Router next to the modem on the lower level. We had no other access points or repeaters other than the Synology AT6600ax Wi-Fi 6 Router.
In some respects, we thought this was an unfair test for the Synology AT6600ax Wi-Fi 6 Router. Was it really possible for a single router to handle all of our network needs, across both levels of the house, when we previously used two other network devices?
To our surprise, not only did the Synology RT6600ax Wi-Fi 6 Router work well, but we didn’t need to add any other devices back into the network to get better than acceptable Wi-Fi service.
Admittedly, in times of heavy traffic, like heavy server activity along with streaming TV and music and printing a large print job, we got a few instances of having to wait a 30 – 60 seconds for a web page to open. But we never dropped a connection and never experienced a network failure.
The Synology RT6600ax Wi-Fi 6 Router does allow you to set some items as higher or lower priority, and while we did not specifically test this, we believe that would have address some of the issues we had with network congestion.
If we were going to keep the Synology RT6600ax Wi-Fi 6 Router as our permanent device, we would probably add the Wi-Fi Extender back into the network just to give a little extra boost to our signal strength, but there is no question the Synology RT6600ax Wi-Fi 6 Router performed well and was up to the task at hand.
Synology also provides an iPhone app which allows you to monitor your network and make some minor adjustments without being tied to your computer.
The Bottom Line
It’s no secret we are fans of Synology products. We continue to believe they have some of the best NAS devices on the market. We were impressed with the RT2600ac router when we reviewed it and the RT6600ax is another winning product.
With its ease of set-up, its simple but powerful SRM application and its ability to provide stable Wi-Fi even under the toughest conditions, we think this may just be the best router on the market today.
The Synology RT6600ax Wi-Fi 6 Router comes with a 2-year warranty and is available from Amazon.
We would like to thank the folks at Synology for providing the Synology RT6600ax Wi-Fi 6 Router for our testing and review.
What kind of router do you use? What do you like or dislike about it? Why not join the conversation and leave a comment below?
If you liked this article, please consider sharing it with your friends and leaving a comment below. Also, don’t forget to “Like” us on Facebook and add the Apple Tech Talk channel to your Apple News app.
Apple Tech Talker

Leave a Comment
You must be logged in to post a comment.