We have looked at several hardware encrypted flash drives in the past. They all worked well but had one common issue. They all had the universal USB-A style connector. With Apple’s move to USB-C connectors a while ago, the Aegis Secure Key 3NXC fills the gap for a hardware encrypted flash drive that you can use without an extra adapter.
Disclosure: Apple Tech Talk participates in various affiliate marketing programs and may receive compensation if you purchase a product through one of our links, and/or in the form of product donations from the companies whose products we review . Unless otherwise specifically stated, Apple Tech Talk does not receive any other compensation for its reviews. The opinions expressed are based solely on our independent testing, are our own and are not shared with anyone prior to release on our site.
Apple Tech Talk Scorecard
| Pros | Cons |
| USB-C connector makes use with a Mac easy | No space to connect another USB-C device at the same time. |
| Long list of features provides excellent data protection |
Aegis Secure Key 3NXC – Unboxing
Even before we opened the box, we could tell the Aegis Secure Key 3NXC was a serious piece of hardware.
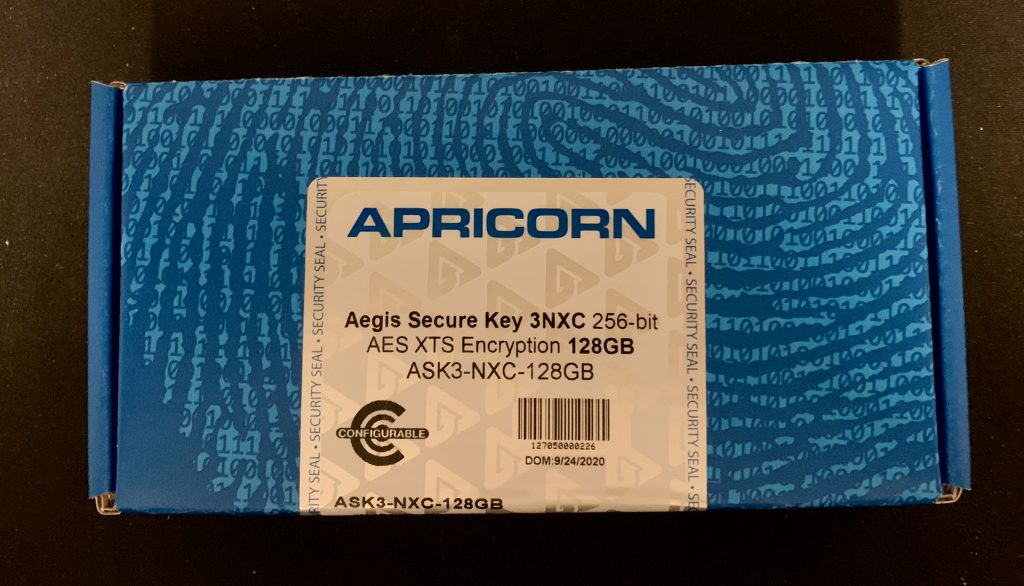
The tamper proof security tape that seals the box is clearly marked with tamper evidence marks and there is no way to remove the tape or open the box without clear evidence that it has been opened.
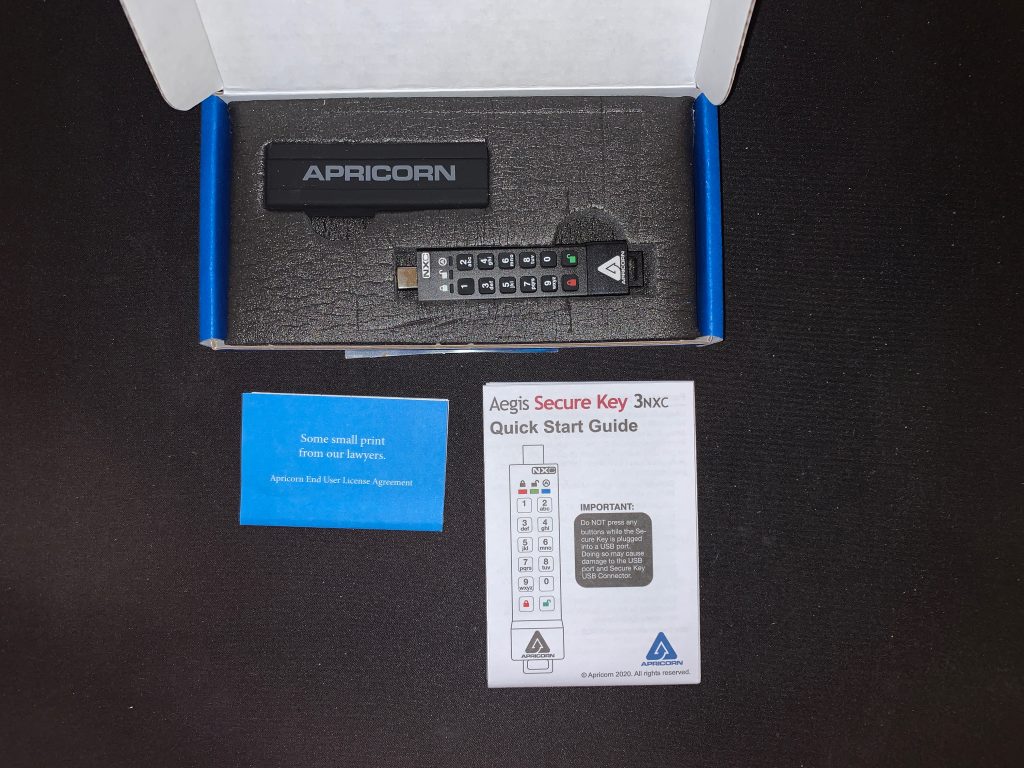
Once you break the seal and open the box, you will find the Aegis Secure Key 3NXC Flash Drive, a silicone sleeve to cover and protect the drive when not in use, a multi-language Quick Start Guide and an End User License Agreement.
Aegis Secure Key 3NXC – Specifications
The Aegis Secure Key 3NXC Flash Drive measures 3.2” x 0.72” x 0.37” (81mm x 18.4mm x 9.5mm) and weighs a mere 0.77 oz (22g). The included silicone cover fits completely over the built-in keypad and adds virtually no additional size or weight to the drive. There is a plastic eyelet incorporated into the bottom of the housing which can be used to attach a lanyard or attached to a keychain for easy transport.
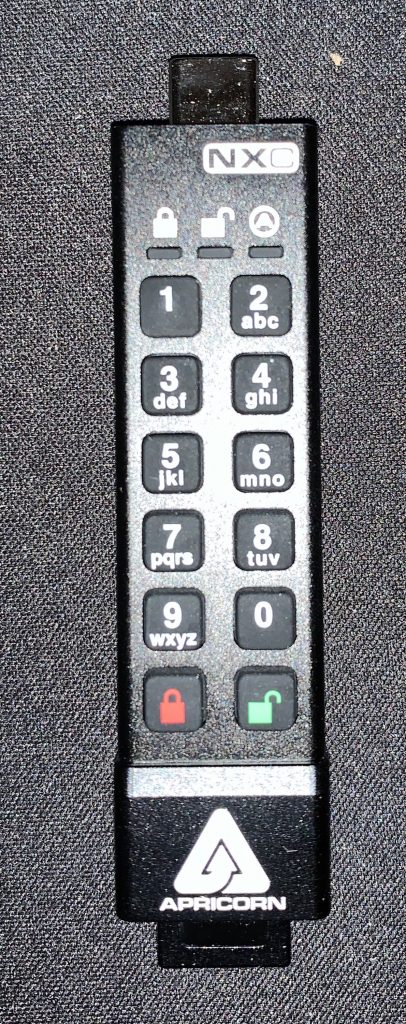
The working end of the drive has a USB 3.2 Type C connector.
At the top of the keypad are three LEDs (red, green and blue), which provides the current status of the drive whether it is locked, unlocked, reading or writing data or in Administrator mode.
Below that is the keypad, numbered 1 – 0 and buttons to lock and unlock the flash drive.
The drive supports On-The-Fly 256-bit AES XTS Hardware Encryption, and since everything is handled by the drive itself, there are no drivers needed. The Aegis Secure Key 3NXC is OS and platform independent and will work on Windows, macOS, Linus, Android and Symbian.
The aluminum housing protects the drive from dust and water infiltration and the internal components are sealed with an epoxy compound barrier which prevents would be hackers from physically accessing the encryption circuitry.
Aegis Secure Key 3NXC – Initial Set-up
Because we needed to know how the drive works, we decided to spend a little extra time with the included Quick Start Guide, and boy are we glad we did.
Beyond the inclusion of the USB-C connector, one of the main differences between the Aegis Secure Key 3NXC and other hardware encrypted drives we have tested, is the inclusion of an internal battery in the Aegis Secure Key 3NXC. While other encrypted drives had to be connected to a USB port before you could unlock and use it, the Aegis Secure Key 3NXC needs all of the key entries to be done BEFORE connecting the drive to a USB port. There is a note on the cover page of the Quick Start Guide which states:
“ Do NOT press any key while the Secure Key is plugged into a USB port. Doing so may cause damage to the USB port and Secure Key USB Connector.”
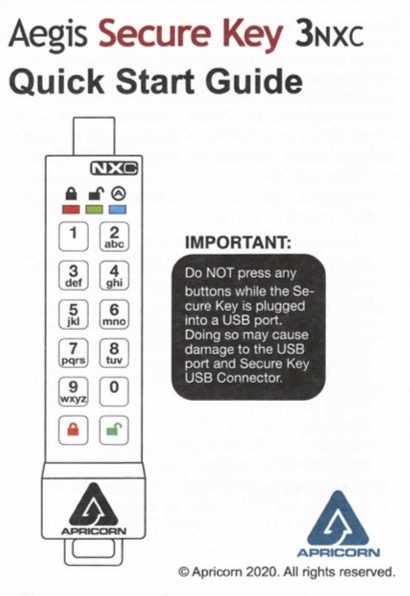
We think this is so important, that we would suggest it be put in red letters or something to make it stand out even more.
The other important piece of information to know is that, like many battery products, the internal battery of the Aegis Secure Key 3NXC is not fully charged when you receive it and it is suggested you plug it into a powered USB-C port for 60 – 80 minutes to fully charge it before proceeding.
With the drive fully charged it was time for the initial set-up.
Unlike other hardware encrypted drives we have tested, the Aegis Secure Key 3NXC does not have a pre-set Administrator password. The process to set up the Admin password (called “Forced Enrollment”, is pretty straight forward and well described in the Quick Start Guide and we had no issues setting it up so we won’t go through it here.
In addition to the Admin password, you have the ability to set up a separate User Pin. This is a great option if you plan to have someone else use the Drive but want to protect the many options the Admin has.
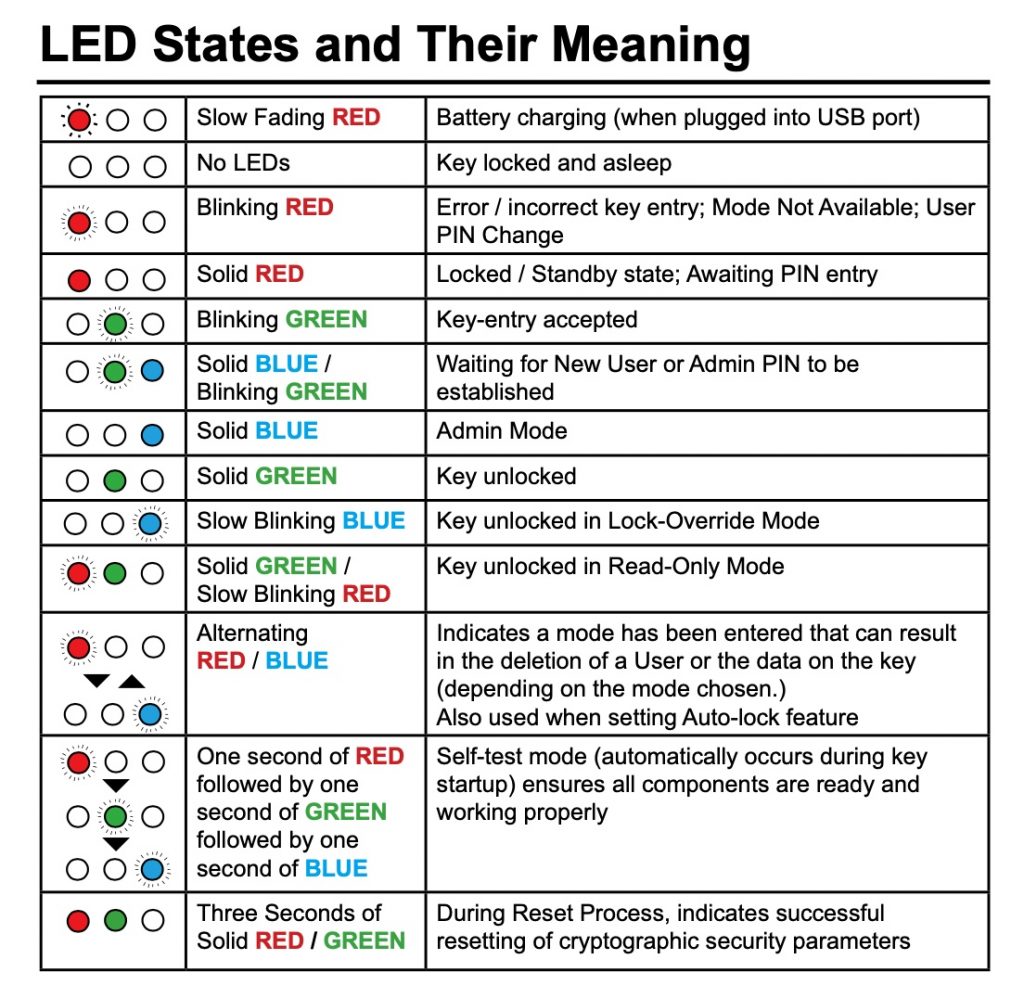
The drive status is determined by the three LEDs mounted at the top. While the most import is to know if the drive is unlocked, there are many more combinations as shown in the chart below.
Aegis Secure Key 3NXC – Test Results
Once the drive is charged, with at least an Admin password assigned, we were ready to start using the Aegis Secure Key 3NXC by inserting it into USB-C port on our 13” MacBook Pro.
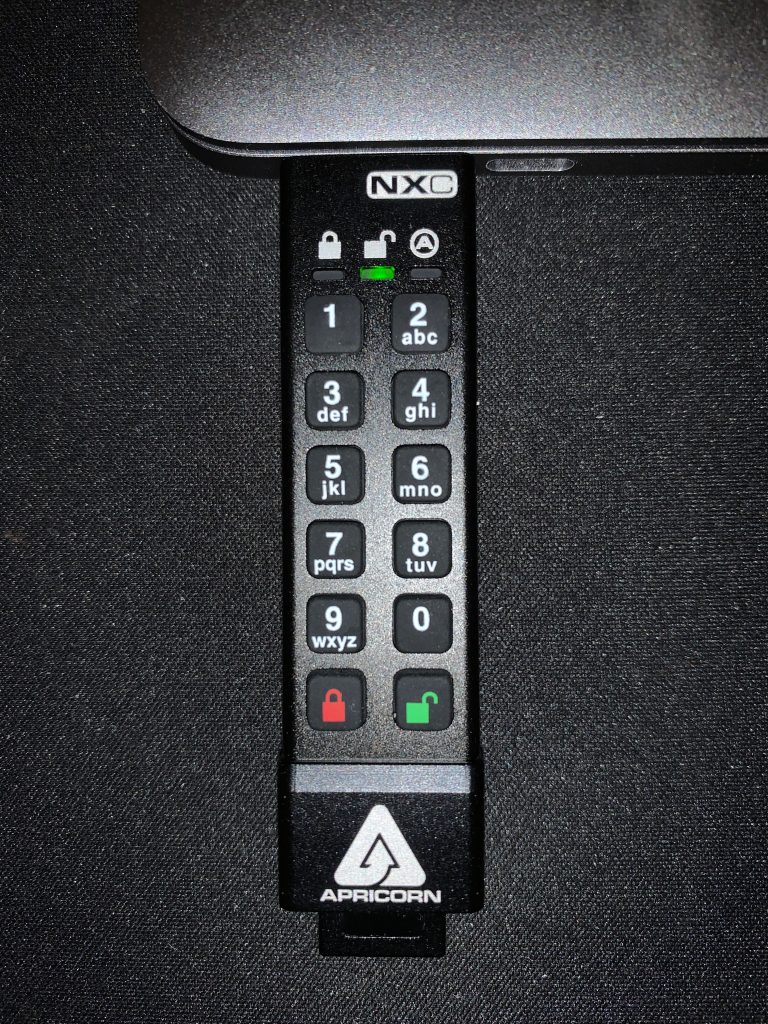
We did notice that with the Aegis Secure Key 3NXC connected to our MacBook Pro, the width of the drive prevented us from attaching any other USB-C cables. While that may not be an issue when you are traveling, it prevented us from using our Time Machine drive and our USB-C hub which connects our external monitor. We would have appreciated if Apricorn (the Aegis Secure Key 3NXC manufacturer) including a short USB-C extension cable. Perhaps this is something to consider in a future update. In the meantime, it might be a good idea to add your own extension cable to your travel bag.
The solid green light confirmed that the drive was unlocked and that allowed it to be mounted and it appeared on our desktop.
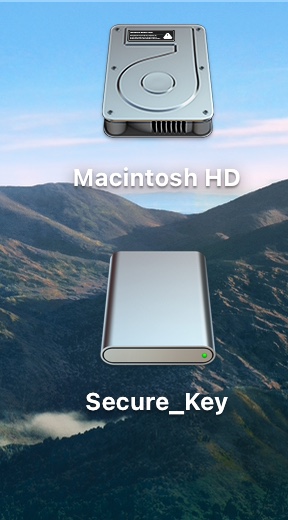
As you can see from our screen shot, the Aegis Secure Key 3NXC shows up with a unique icon rather than the standard orange HDD icon you usually see in macOS.
The Aegis Secure Key 3NXC comes preformatted in NTFS for Windows® and the Quick Start Guide suggests reformatting it to a macOS friendly format. But be aware that there are several files on the drive. This includes a very detailed 23 page User Guide which provides details on all of the various options and functions of the drive. The manual is provided in multiple languages, each in its own file. If you happen to forget to download the file before you erase it, they are all available from the Apricorn web site.
What was not on the drive, even as a hidden file, was the .icns file that generates the unique icon. In most cases, that means that erasing and reformatting the drive destroys the unique icon. Fortunately, it appears Apricorn hard coded the icon into the drive as erasing the drive did not destroy the icon.
We appreciate that Apricorn made their icon unique and we wish other drive manufacturers would do the same. Unfortunately, the icon does not represent the actual drive you have connected. Some drive manufacturers, like LaCie, provide a library of icon files for their products, with each icon matching the specific drive you are using. We really like that idea so, while the unique icon was a great first step, we wanted to take it a little further.
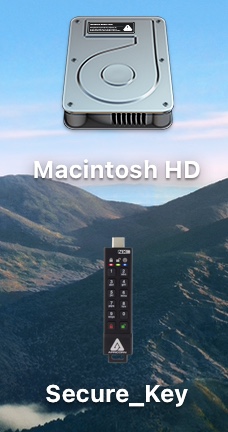
We decided to create our own icon file and assign it to this drive. Now, when we attach the drive to our MacBook Pro, there is no question which drive we are working on.
The drive itself worked as any other flash drive would. The big difference is that all data is automatically encrypted, as it is being written to the drive. The drive is rated for data transfer rates of 77MB/s Read and 72 MB/s Write.
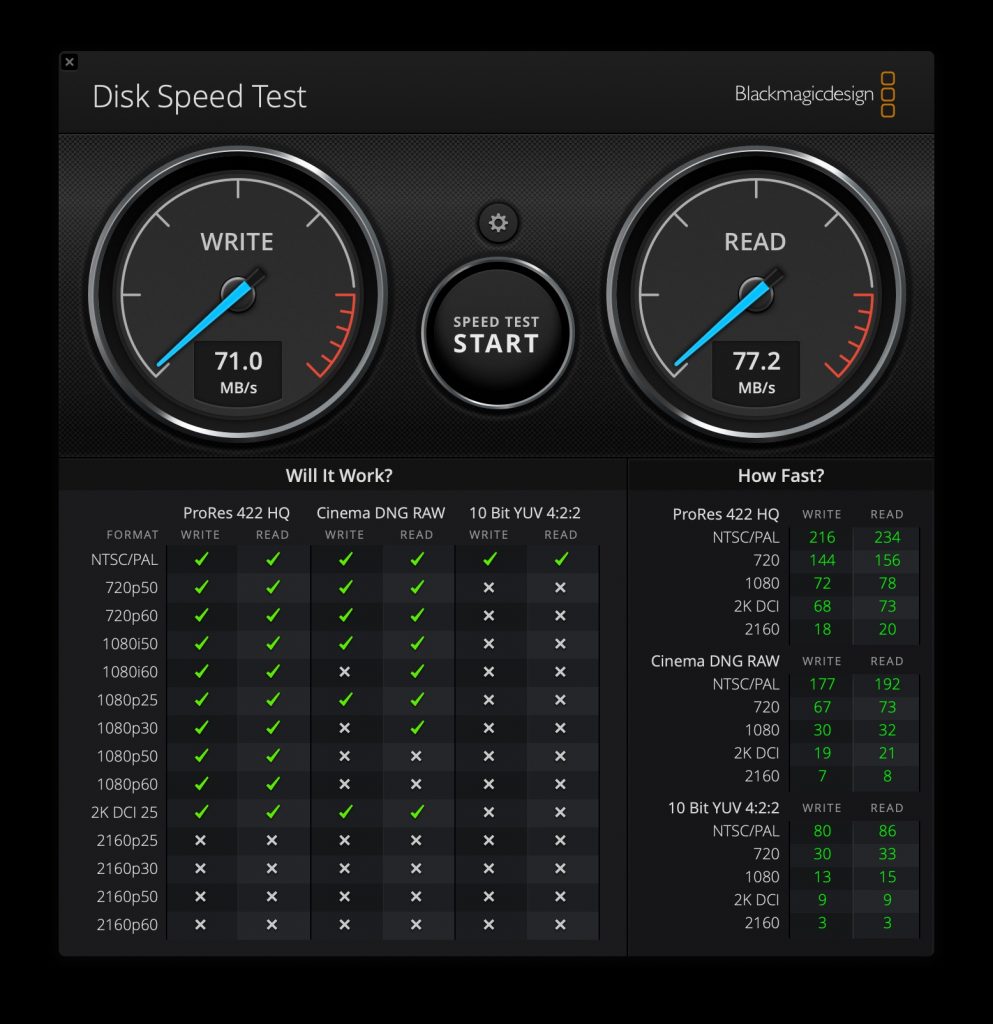
Our results, using the Black Magic Speed Test were almost identical.
Aegis Secure Key 3NXC – Features and Functions
If all the Aegis Secure Key 3NXC did was provide a secure way to store and transfer data, it would be a great device. But, it provides many more features and functions. We don’t have the ability to go over all of them in detail but we want to highlight at least some of the more important ones.
One-Time-Use Recovery PIN The admin can set up to four (4) one-time-use recovery PINs that allow a user to access the drive without deleting the data, in case of a forgotten password. Once the PIN is used one time, it is no longer valid. Setting Read Only or Read/Write Mode Both the admin and a regular user have the ability to make the drive read only or read/write. Setting the PIN Length By default the minimum PIN length is 7 characters. However, the admin can increase that number to enhance security. Setting a Self-Destruct PIN In the event you are concerned that you could be pressured to reveal the contents of the drive, a Self-Destruct PIN can be set so that when entered, the drive will erase all of the contents and make it look like there was never any data on it to begin with. Unattended Auto-Lock By default, the drive remains unlocked as long as it is connected to a USB port. That can be changed so the drive automatically locks itself after 5, 10 or 20 minutes of inactivity. Brute Force Protection Based on the criteria set up by the Admin, the drive will lock itself when 50% of the failed attempt limit has been reached. Once locked, the drive can only be unlocked using a special code and a valid PIN. Lock-Override Mode At times, you need to reboot your computer but need the drive connected to your USB port to remain available (unlocked). The Lock-Override Mode allows the drive to remain unlocked as long as the USB port remains powered.
As you can see, this little device has some serious data protection capabilities.
For organizations that want to do mass deployment, the Aegis Configurator allows for configuration of multiple units at one time. This is a perfect solution for rapid deployment with pre-defined configuration needs.
That said, from what we can tell, the Aegis Configurator works in Windows only so you will need a PC running Windows 7, 8 or 10 to use this.
The Bottom Line
When it comes to data protection, there is no such thing as too much. And with more and more manufacturers turning to the USB-C standard, having a hardware encrypted flash drive with a USB-C connector built in is a great option.
The ability to unlock the drive before connecting it to the computer is a nice feature and certainly improves the ease of use of the drive.
If you just want to lock down your data, the Aegis Secure Key 3NXC is a great choice. Add in all of the options and features it provides, and it’s hard to come up with a reason not to add this to your portable flash drive options.
The Aegis Secure Key 3NXC is available in capacities from 4GB to 128GB and come with a 3-year manufacturer’s warranty.
If you like the idea of the Aegis Secure Key 3NXC but need the more common USB-A connector, check out the Aegis Secure Key 3NX. It has all the same great feature and protection with a USB-A end. It is available is sizes ranging from 2GB to 128 GB.
We would like to thank the folks at Apricorn for providing the Aegis Secure Key 3NXC for our testing and review.
How do you keep your data protected when traveling or sharing it with others? Why not join the conversation and leave a comment below?
If you liked this article, please consider sharing it with your friends and leaving a comment below. Also, don’t forget to “Like” us on Facebook, “Follow Us” on Twitter and add the Apple Tech Talk channel to your Apple News app.
And if you haven’t subscribed to Apple Tech Talk, now would be a great time to do it so. Just scroll down to the form below and enter your name and email address. Then you’ll receive a notification whenever we post new articles. Don’t worry, we never sell or share your information. While you’re at it, check out our YouTube channel (here) where you will find video on interesting products any Apple enthusiast would love.


Leave a Comment
You must be logged in to post a comment.