
AirDrop is a wireless sharing feature that is quick, secure, and incredibly user-friendly. In this guide, we’ll walk you through the ins and outs of how to use AirDrop to transfer files between your Apple devices effortlessly. Whether you’re a seasoned Apple enthusiast or a newcomer to the ecosystem, mastering AirDrop is a skill you’ll want to have in your digital toolkit.
What Is AirDrop and Why Should You Use It?
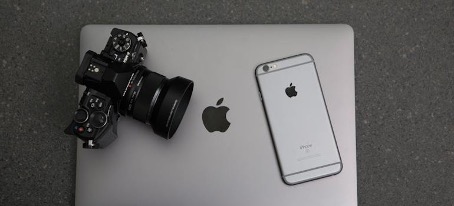
You’ve just got a new Apple laptop and want to transfer data from your other Apple device. How can you do it? Enter AirDrop, the peerless file-sharing feature that Apple provides on its devices. AirDrop is more than just a convenience; it’s a game-changer for seamless data transfer between your Apple gadgets. With its lightning-fast speed, effortless setup, and impeccable security measures, AirDrop simplifies the way you share files.
AirDrop is a built-in Apple feature that allows users to wirelessly share files, photos, videos, and more between their Apple devices with remarkable ease. Its indispensability lies in its ability to streamline and expedite data transfer, making it an invaluable tool for efficient collaboration, seamless content sharing, and hassle-free device synchronization within the Apple ecosystem.
Compatible Apple Devices and Versions
To fully use AirDrop to transfer files between devices, you need to know which Apple devices and operating system versions support this feature. Fortunately, AirDrop is available on a wide range of Apple hardware. This includes iPhone, iPad, iPod Touch, and Mac. It works seamlessly on iOS 7 or later for mobile devices and macOS Yosemite (10.10) or later for Macs. Knowing that AirDrop supports this extensive list of devices and software versions ensures you can share files effortlessly across your Apple ecosystem without compatibility concerns.

Setting Up AirDrop
Setting up AirDrop is a breeze, and it’s the gateway to seamless file sharing between your Apple devices. Here’s how to get started:
- Access Control Center (iOS) or Finder (Mac): On your iPhone, iPad, or Mac, swipe down to access Control Center or open Finder. Ensure that Bluetooth and Wi-Fi are turned on.
- Activate AirDrop: In Control Center (iOS) or Finder (Mac), you’ll see the AirDrop icon. Tap it (iOS) or click it (Mac) to open the AirDrop settings.
- Choose Your Visibility: You can set AirDrop visibility to “Everyone,” “Contacts Only,” or “Receiving Off.” Select “Everyone” for the broadest accessibility.
How to Use AirDrop to Transfer Files
AirDrop’s simplicity shines when it comes to sharing files between your Apple devices. Here’s how it’s done:
- Select Your Files: On the device you’re sending from, choose the files you want to share, whether they’re photos, documents, or more.
- Tap the Share Button: Look for the Share button within your app, usually represented as a box with an arrow pointing upward.
- Choose AirDrop: From the list of sharing options, select AirDrop. You’ll see a list of nearby Apple devices.
- Select the Recipient: Tap the device to which you want to send the files. The recipient will receive a notification to accept or decline the transfer.
- Confirmation: The files transfer quickly via Wi-Fi and Bluetooth once the recipient accepts.
Let’s say you’re about to travel with your iPhone and need to transfer important documents from your Mac before you go. With AirDrop enabled on both devices, open the file on your Mac, click the Share button, and select your iPhone from the AirDrop list. Confirm the transfer on your iPhone, and voilà, your files are ready for your trip. AirDrop makes transferring files as effortless as a few taps or clicks, ensuring you have access to your essential data wherever you go.
Using AirDrop, you can effortlessly send files between your Apple devices, eliminating the need for cables, emails, or cloud storage. It’s also a swift and convenient way to share content with friends, family, or colleagues.
Troubleshooting Common AirDrop Issues
While AirDrop is a fantastic tool, occasional hiccups can occur. Here’s how to tackle common problems:
- Enable Wi-Fi and Bluetooth: Ensure both Wi-Fi and Bluetooth are activated on both devices. AirDrop relies on these technologies for seamless communication.
- Adjust AirDrop Visibility: If you can’t see the recipient’s device, check your AirDrop visibility settings. Set it to “Everyone” for broader access.
- Update Software: Outdated software can cause compatibility issues. Ensure your devices are running the latest iOS or macOS version.
- Firewall or Security Software: Firewalls or third-party security software may interfere with AirDrop. Temporarily disable them if needed.
- Incompatibility: Not all Apple devices support AirDrop. Verify compatibility between your devices.
Addressing these common issues ensures a smoother AirDrop experience and hassle-free file sharing across your Apple devices.
Privacy and Security Concerns
Most people worry about securing digital transactions, but privacy and security concerns are vital when it comes to sharing any data. So, here are some precautions to take when using AirDrop:
- Limited Visibility: AirDrop is visible to anyone nearby, raising concerns about unsolicited file sharing. Choose “Contacts Only” or “Receiving Off” in crowded places.
- Bluetooth and Wi-Fi Risks: Since AirDrop uses Bluetooth and Wi-Fi, it may expose your device to potential threats. Ensure you trust the sender’s device.
- Acceptance Prompt: Receiving files requires your approval, but be cautious of accepting files from unknown sources.
- Privacy Settings: Regularly review your AirDrop settings to maintain control over who can send you files.

Tips and Tricks for Efficient AirDropping
To make the most of AirDrop, consider these tips:
- Organize Your Devices: Rename your devices to easily identify them during transfers.
- Customize AirDrop Name: Change your AirDrop name for added personalization.
- Clear Your Share Sheet: Remove unwanted contacts from your share sheet for a clutter-free experience.
- Use AirDrop Password: Enable password protection for an added layer of security.
- Keep Devices Close: Ensure devices are within 30 feet for optimal AirDrop performance.
By implementing these tips, you can streamline your AirDrop experience and make file sharing between your Apple devices even more efficient.
The Bottom Line
Mastering how to use AirDrop to transfer files between your Apple devices is a skill every Apple enthusiast should possess. With its compatibility across various Apple devices, straightforward setup process, and efficient file-sharing capabilities, AirDrop simplifies digital life. By addressing common issues and considering privacy concerns, you can ensure secure and efficient data transfers within the Apple ecosystem. Embrace AirDrop and experience hassle-free file sharing today.
If you liked this article, please consider sharing it with your friends and leaving a comment below. Also, don’t forget to “Like” us on Facebook and add the Apple Tech Talk channel to your Apple News app.
Charlie Woods
Charlie Woods is a seasoned marketing expert at Movers Development, a leading digital marketing company with over 100 moving companies under their belt. With a passion for technology and a keen interest in optimizing digital experiences, Charlie shares practical insights on utilizing different tools to attain the most desirable results.

Is there a way to transfer files from an original 1st generation IPAD to a 9th generation refurbished IPAD? Not sure if the 1st gen is backed up to cloud or not.
Thanks for your question. Many people worry about loosing data when they upgrade older Apple hardware. Fortunately, Apple has thought about this for a long time.
As you know, the 1st Gen iPad has not been supported for some time. That said, we believe it was able to connect to iCloud buy the time the last software update was released.
Our suggestion is to go into Settings and see where it says iCloud. On more modern iPad models, it would be at the top of the Settings screen where it has your name. On your 1st Gen, it may have its own menu item.
If you do find an iCloud listing, make sure the ID and password match the iCloud account you use on your new iPad. If all of that is set up, you should be able to back-up your 1st Gen iPad to iCloud, and then restore that backup to your 9th Gen iPad. If you don’t remember the iCloud ID and/or password for the old iPad, you can always create a new one for the new iPad, and then sign into the old iPad with the same credentials.
Good luck, and enjoy your new iPad.