It wasn’t that long ago that a Virtual Private Network (“VPN”), was reserved for large corporations with sophisticated networks and highly trained technicians that understood how it worked and how to set one up.
Today, a VPN has become much more common and while many come with a steep fee and, in many cases, a long term contract, there are alternatives the make access to a VPN easy and affordable, thanks to PrivadoVPN.
Apple Tech Talk Score Card
| Pros | Cons |
| Free version provides good service | None |
| Premium services are reasonable priced |
About PrivadoVPN
PrivadoVPN is a Switzerland based provider of VPN service around the world. Being based in Switzerland, they offer some of the strongest consumer protections available and provide a No-Log service. That means they do not keep records of your Internet activity.
They have servers in 60 cities across 47 countries so you can easily change your server location if needed.
They offer application for most current operating systems including macOS and iOS devices.
PrivadoVPN – Set-up
While there is certainly no shortage of VPN providers, PrivadoVPN is one of the few we have found that offers an actual free version of their service. We decided to try the free service to see if it was really as good as they claimed.
To start the process, you have to go to the PrivadoVPN web site (here). There you can find out all you need to know about PrivadoVPN, including details on their features, their server location, the software they provide and a Blog with informative topics that you will find interesting. There are buttons on almost every screen offering to get started with their service.
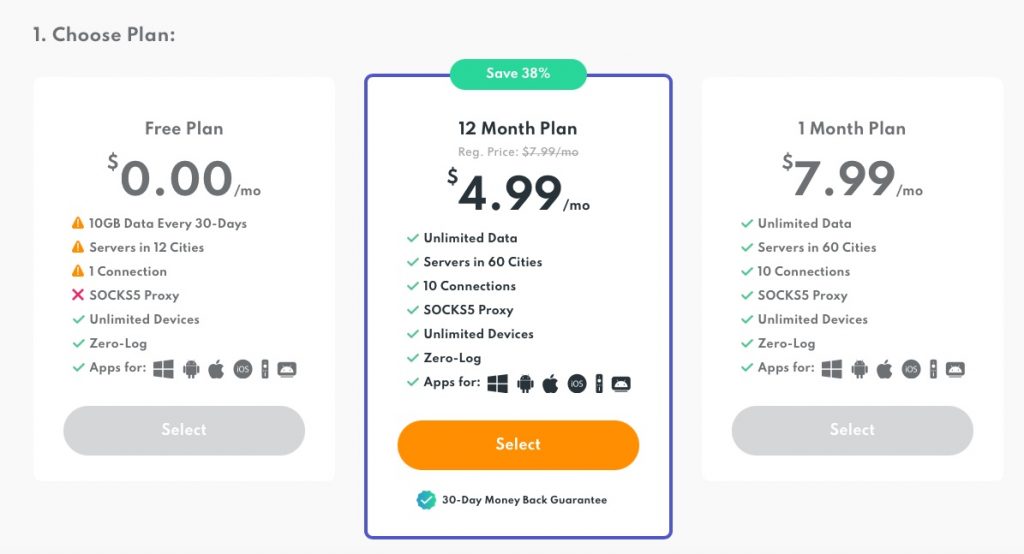
Not surprising, when you click on any of the buttons, you are taken to their Choose Plan page with a suggestion to purchase one of their premium plans. We decided to use the Free plan. (More on the plan offerings in a moment). After selecting a plan you need to create a free account.
Although you use your email address to create the account, the account user name is created by their system and is a random combination of letters and numbers which is clearly intended to hide your true identity. This is the first time we have seen this on a VPN service and think it is a good idea. But be warned, you will never remember the user ID that is created so write it down somewhere for future reference.
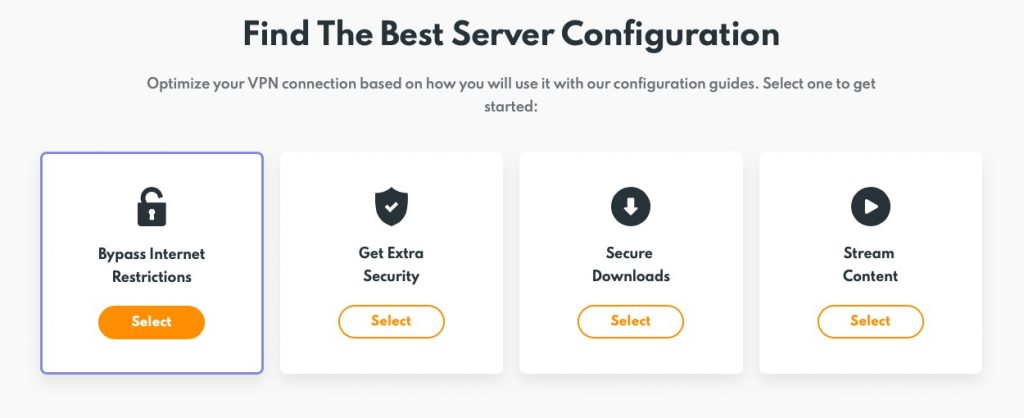
As part of the initial set-up, you are asked to select the best server configuration from the four choices provided (above). Unfortunately, you are only allowed to select one. We found this a little strange since people tend to use a VPN for a variety of reasons, and perhaps we missed it but we did not find a way to change your selection after your initial selection.
Truth be told, we’re not sure this selection has any impact on the PrivadoVPN operation or server selection, and may just be a way for PrivadoVPN to gather user data.
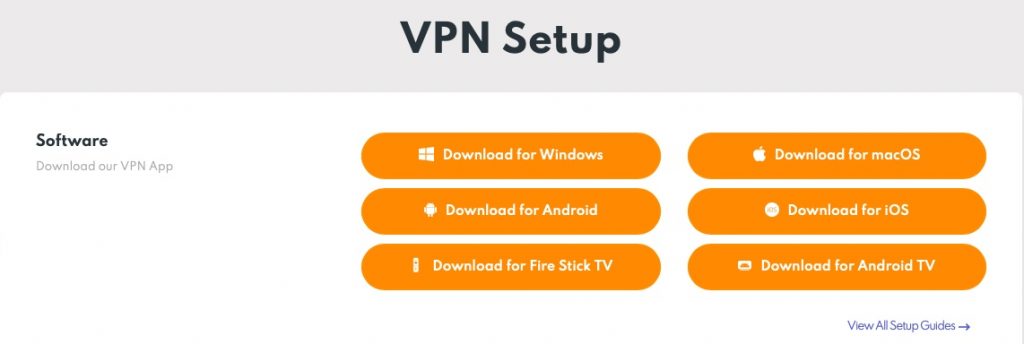
Finally, you are given the option to download the PrivadoVPN application for your operating system, which includes choices for macOS, iOS, Windows, Android and others.
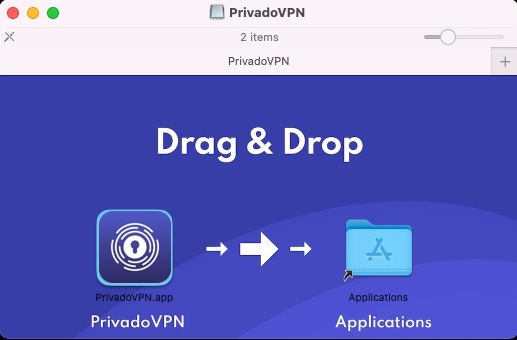
We selected the application for macOS which downloaded a familiar .dmg file. Clicking on that file mounted the installer and opened an installation window which simply required we drag the application icon onto the application folder icon in the same window.
PrivadoVPN – Use and Test Results
With our account set up and the application installed, it was time to test out the application.
In the early days of the Internet, using a VPN was hard enough, and setting one was not a task for the faint at heart. Things have changed quite a bit since then and PrivadioVPN has certainly made setting up and using a VPN as easy as clicking a few buttons.
When you launch the application the first time, you are asked to sign in with your user ID and password. As we said before, the user ID is complicated and your password should be strong so we suggest saving these credentials to your Key Chain for future use.
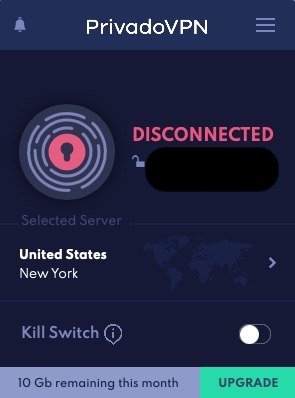
Once logged in, you are presented with a window that shows your current IP address and your current location.
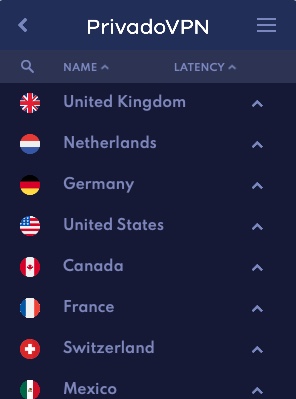
Clicking the hamburger menu at the top of the screen opens a list of server locations you can choose from. We tested several server locations and found the performance to be equal between them.
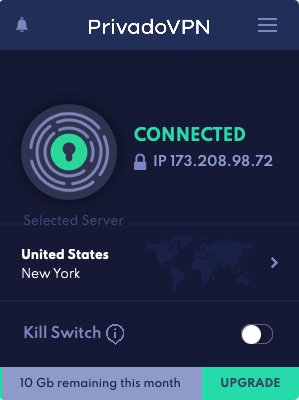
Once you select the location and server, it takes only a few seconds to establish a connection. When done, the screen shows your status as Connected, along with your now current IP address.
To end the VPN session, just click the icon with the key hole image (it will have rotating circles around it). That will break the VPN connection and it will once again show your actual IP address and location.
It you want to change the server location, just click the arrow next to the selected city and the server list will appear. We found you can change servers at any time, even if you have an active VPN session going.
The application also contains a “Kill Switch”, which PrivadoVPN says will “suspend all open internet application and browsers if you get disconnected from the PrivadoVPN client.”
Overall, we found PrivadoVPN to work flawlessly. The connections were established quickly and were rock solid. We have tried other VPN services and found that depending on the location, some functionality was reduced or not available at all. That was not the case with PrivadoVPN. Selecting several sites provided the same consistent results and speed.
The application itself is light weight and there was no noticeable impact to our Mac’s performance.
There are also some preferences you can select like Auto Connect, which will automatically log you in and connect you to a server as soon as you launch the app. You can preselect to be connected to the best location, your previously saved location or a random location.
You can also select from a couple of VPN protocols like IKEv2 and Open VPN, although this appears to be reserved for premium users.
You can also select to have the application launch automatically whenever you start your computer.
These are all nice features and we appreciate that most of them are offered on the free plan.
The Plans
The PrivadoVPN pricing model is pretty simple, either you have the free service or the paid service. Both options have a zero-log policy and the same platform applications.
The free plan provides access to servers in nine countries. All but the USA has 1 city in the country. The US has five major cities. It allows one connection and allows only 10GB of data every 30-days. For someone who needs only occasional access to a VPN, this may be enough.
Upgrading to a paid plan gives access to servers in 60 cities, with up to 10 connections and unlimited data. It also provides a SOCKS5 Proxy and unlimited devices.
If you like the options of the paid plan but only need a VPN on rare occasions, you can purchase it monthly for $7.99. For anyone that has a regular need for a VPN and needs to move large amounts of data, the paid plan is only $4.99 per month for 12-month. In addition, the 12-month plan comes with a 30-day money back guarantee.
If you’re new to VPNs, it might make sense to try the free plan to get familiar with it. We suspect, like many people, once you try it, you will use it more than you thought you would. If that’s the case, you can easily upgrade to the 12-month plan.
The Bottom Line
While VPNs used to be reserved for large corporations and financial institutions, they have moved into the main stream and are now available to anyone. There are many reasons to use a VPN and like many things in life, people may know they should use a VPN but don’t because it is too complicated or expensive.
Thanks to PrivadoVPN, that is no longer an issue. With their free option and very reasonably priced paid alternative, along with their easy to use applications for just about any platform, there really is no reason not to have a VPN available when you need it.
You can find out more about PrivadoVPN, sign up for their service and download the application at their web site privadovpn.com.
Do you use a VPN? If so, what are some of the things you use it for and who is your favorite provider? Why not join the conversation and leave a comment below?
If you liked this article, please consider sharing it with your friends and leaving a comment below. Also, don’t forget to “Like” us on Facebook, “Follow Us” on Twitter and add the Apple Tech Talk channel to your Apple News app.
And if you haven’t subscribed to Apple Tech Talk, now would be a great time to do it so. Just scroll down to the form below and enter your name and email address. Then you’ll receive a notification whenever we post new articles. Don’t worry, we never sell or share your information. While you’re at it, check out our YouTube channel (here) where you will find video on interesting products any Apple enthusiast would love.



Leave a Comment
You must be logged in to post a comment.