
If you’re looking to upgrade to Big Sur, there’s some important prep work you can do on your Mac to make the change go smoothly, and we’ll walk you through it. But first, what are the benefits of upgrading to Big Sur?
Disclosure: Apple Tech Talk participates in various affiliate marketing programs and may receive compensation if you purchase a product through one of our links, and/or in the form of product donations from the companies whose products we review . Unless otherwise specifically stated, Apple Tech Talk does not receive any other compensation for its reviews. The opinions expressed are based solely on our independent testing, are our own and are not shared with anyone prior to release on our site.
For starters, there’s some funky new wallpapers, but there’s some major changes that you’ll notice in the look of the Big Sur update as well as the performance. The aesthetics and style of Big Sur is now much closer to iOS, and Apple Maps has been revamped to share the same codebase with iOS too. Safari has seen the biggest update ever, and the Dock has been revamped, along with the Notification Center, Control Center, and more.
Is Your Mac Compatible?
If you’re excited to install Big Sur, then make sure your Mac is capable of running it first. Here’s a list of Macs that will take the upgrade:
- MacBook – 2015 and later
- MacBook Air – 2013 and later
- MacBook Pro – late 2013 and later
- Mac mini – 2014 and later
- iMac – 2014 and later
- iMac Pro – 2017 and later (all models)
- Mac Pro – 2013 and later
Make Sure You’ve Got Enough Disk Space!
It may seem like we’re stating the obvious, but it’s worth giving your system a thorough clean to free up disk space before installing a macOS update – having 15-20GB spare is a good idea.

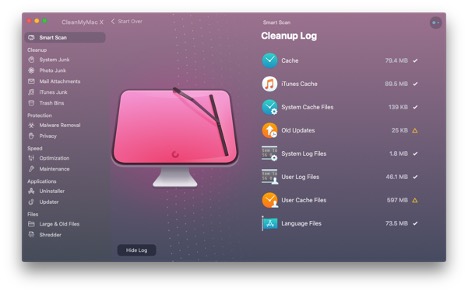
If you’re looking to do some deep cleaning on your Mac to gain extra space, but really don’t want to spend ages searching through files and unused apps, then there is another way – use a dedicated Mac cleaning app like CleanMyMac X.
Use the one-click Smart Scan to do a thorough search for any space-sucking junk that’s lurking in the hidden reaches of your Mac – you may well be surprised by how much space you can free up.
Have you got apps you never use anymore? Go through them and uninstall the ones you don’t need. This can take time if you have a lot of apps, but it can be done a lot quicker by using the Uninstaller on CleanMyMac X – it will also do a clean uninstall so that there’s no junk files associated with the apps left over.
Updating your apps can also have a positive effect on your Mac’s speed, so make sure they are updated regularly. You can do this on your App Store apps very easily. All you need to do is make sure you have Automatic Updates turned on by launching the App Store/App Store Menu/Preferences and checking the box next to automatic updates.
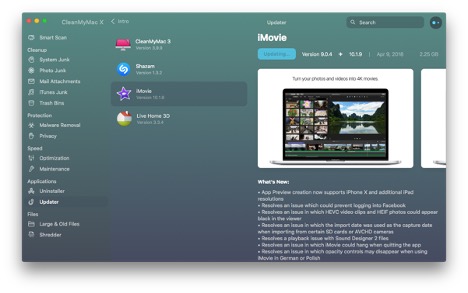
If you have apps you didn’t get from the App Store, use the Updater in CleanMyMac X to keep these apps up to date automatically, too.
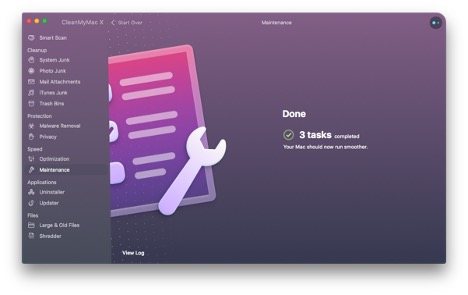
Big Sur is a groundbreaking update for macOS, but like all big new updates, it could slow your Mac down. How to speed it back up again? A Mac cleaner like CleanMyMac X can help you out here too. The Maintenance and Optimization tools will scan to see what may be slowing your system down, and will fix them for you.
What about login and launch agents? These can slow your Mac considerably, so it’s worth taking a look at what you have running. You can go through and delete the unwanted ones yourself, or you can use CleanMyMac X to find and remove them for you.
Cleaning up your Mac and making sure everything is running as fast and well as it should be before installing Big Sur should go a long way to making sure your update goes smoothly. Once you’ve installed Big Sur, make sure you update regularly when Apple brings out new updates in future, as they often contain bug fixes that can keep your Mac running as it should.
Apple Tech talk previously did an independent review of CleanMyMac X and you can read the full review here.
If you liked this article, please consider sharing it with your friends and leaving a comment below. Also, don’t forget to “Like” us on Facebook and add the Apple Tech Talk channel to your Apple News app.
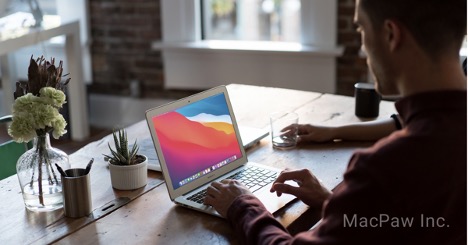
MacPaw Inc.
This article was prepared for Apple Tech Talk by MacPaw Inc., makers of CleanMyMac X. Apple Tech Talk is an affiliate marketer for MacPaw Inc.

Leave a Comment
You must be logged in to post a comment.