
We have looked at a variety of Network Attached Storage (NAS) devices (read our reviews here). In March 2017, Drobo announced the “the next era of storage solutions” with their release of the Drobo 5N2 (read the announcement here). We’ve now had an opportunity to test the Drobo 5N2 for ourselves and we are quite impressed.
Apple Tech Talk Scorecard
| Pros | Cons |
| No tools or carriers for disks | No USB Port |
| Easy set-up and management | Admin must be on the same network |
| Drobo Dashboard for Mac |
Drobo 5N2 – Specifications
If you missed our review of the Drobo 5D, we suggest you take a few minutes to check it out (read our review here), because much of the information about the Drobo 5D applies to the Drobo 5N2.
If you sit them side-by-side, it is nearly impossible to tell the two units apart from the front.
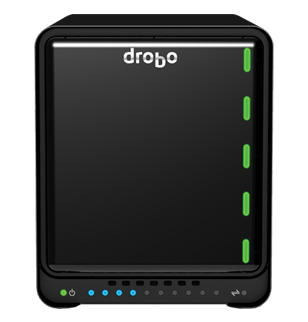
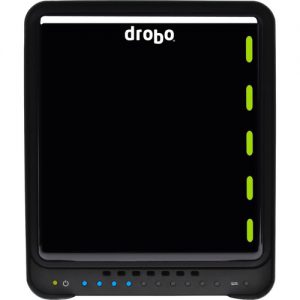
Both units measure 5.9” wide x 7.3” high x 10.3” deep and weighs 8.5 lbs. without the power supply or hard drives. They both use the identical magnetic cover that covers their 5 hard drive bays and have the same red, yellow and green lights along the right side to indicate the drive status and the blue LEDs across the bottom to indicate capacity usage. Finally, both units have the compartment on the bottom to hold an mSATA module used to cache commonly used data and improve overall efficiency.
The back of the units are, however, quite different. While the Drobo 5D has two Thunderbolt and one USB 3.0 connection, the back of the Drobo 5N2 has two Gigabit Ethernet ports and no USB.
Drobo 5N2 – Unboxing and Set-up
In the box is the Drobo 5N2, wrapped in the same style black fabric bag as the Drobo 5D. In the accessory box was the Drobo power supply with 6 ft (1.8M) power cord, 2 6ft Ethernet cables and the Drobo Quick Start card. For those who need more information a detailed User Guide is available on the Drobo web site and you can see a copy of it here.
Setting up the Drobo 5N2 begins by going to the dedicated Drobo web site www.drobo.com/start. The site takes you through some rather obvious steps to set up your device. Eventually you download the Drobo Dashboard for Mac application.
The Drobo 5N2 uses the same no tools and no carriers required disk installation that they have become known for, and while you can use any brand, any size and any speed 2.5” or 3.5” hard drive, we found that the Drobo 5N2 can be a little finicky if the disks are not new.
The instructions make it very clear that you cannot migrate a Drobo Disk Pack from anything other than a Drobo FS or a 5N (the predecessor to the 5N2). We wanted to use the 1TB Seagate NAS Drives previously used in our Drobo 5D.
It was our expectation that any data on those disks would be lost, as one of the first things a Drobo does in the set-up process is to format the drives and build the RAID array, so we didn’t see any reason we couldn’t use the disks. That said, we were surprised to discover that when we inserted the disks into the Drobo 5N2, powered it on and started the set-up process, we received an error message that the disks were not compatible with the 5N2. We certainly didn’t expect that given that these disks worked fine in the 5D.
As it turned out, there was nothing wrong with the disks except that they had previously been used and the Drobo 5N2 just didn’t like that. We formatted the disks using Disk Utility on our MacBook Pro and reinstalled the disks and this time the 5N2 started up without issue and completed the format and set-up which included installing the latest firmware directly from the Drobo site..
We did reach out to Drobo regarding the “not compatible” message and they agreed that should not have happened. They will investigate and we suspect address it in a future firmware update if needed.
The time it takes for the set-up to complete is dependent on the number and size of the disks you use. We suggest you let the set-up process complete and wait for all of the disk indicators to be solid green before proceeding further.
Drobo Dashboard
The Drobo Dashboard (currently at version 3.1.3), is the same application as the one we downloaded when we set up our Drobo 5D (are you seeing a pattern here). When we reviewed the 5D we commented that once the hardware was up and running you probably wouldn’t spend much time with the Drobo Dashboard. That is certainly not the case for the Drobo 5N2. The Drobo dashboard is your main control center for the Drobo 5N2 and you will probably spend a fair amount of time using it. Fortunately, its clean design and straight-forward screens mean you should be comfortable using it almost immediately. While we can’t cover ever screen and button in our review, we want to focus on some of the more important areas.
As part of the install of the Dashboard app, you can place a small Drobo icon in your meu bar. This is extremely handy as you can open the app at any time without having to go to the Finder or even open Spotlight.
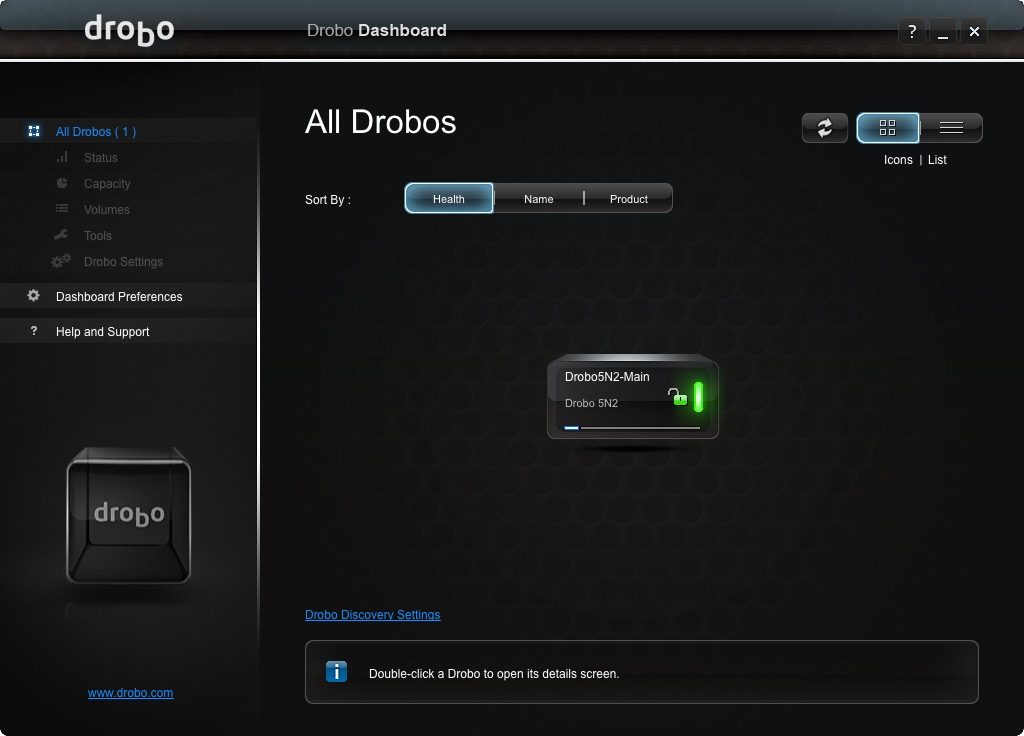
The main screen of Dashboard provides an overview of the Drobos you have on your system. We are just showing one Drobo 5N2, but if we had our 5D connected to our Mac it would appear in this window and we could manage any and all Drobo units from this one app. Selecting the actual Drobo unit populates the empty Drobo icon on the left sidebar and the indicator lights match what is on the actual hardware. This can be very helpful if you are not sitting right next to your Drobo units. It also activates the sub-menu on the top of the sidebar.
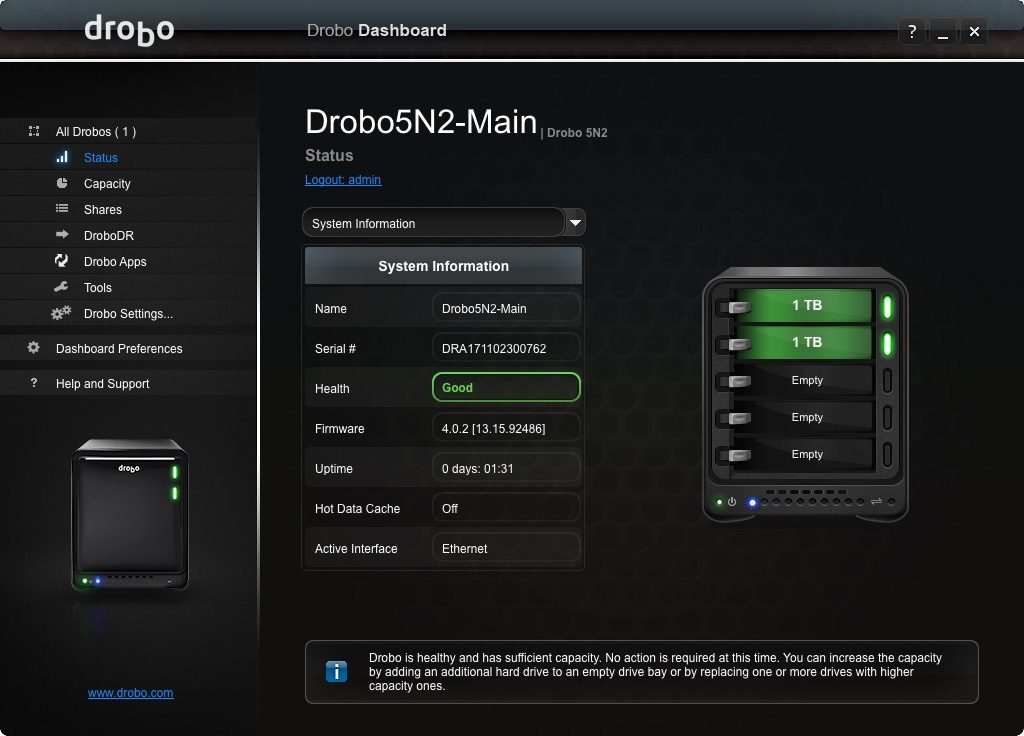
The Status menu tells you just about everything you need to know about your Drobo unit including details about the system’s health, firmware and uptime. Switching to Drive Information gives details on Brand, Model, Serial Number, Firmware and health of each drive. Network information includes assigned IP address, MAC address, DNS Server and more.
To be clear, there is nothing unique about the variety of information provided by the Dashboard. We just think Drobo has done an excellent job of presenting it in a way that is easy to understand.

Share Management is probably the easiest we have seen of the various NAS products we have tested. While none of them would be considered difficult, the way Drobo presents it leaves little room for error.
The Shares are all listed on the left side of the window. To add a new Share just press the Add button and enter the name of your Share. When you do, you are presented with a series of boxes on the right to control access to the Share. On the first click the boxes fill with an eye icon for Read-Only Access. A second click turns it into a pencil icon for Read-Write access. You can mix and match the icons to suit your needs. (The Admin always has Read-Write access to every Share.)
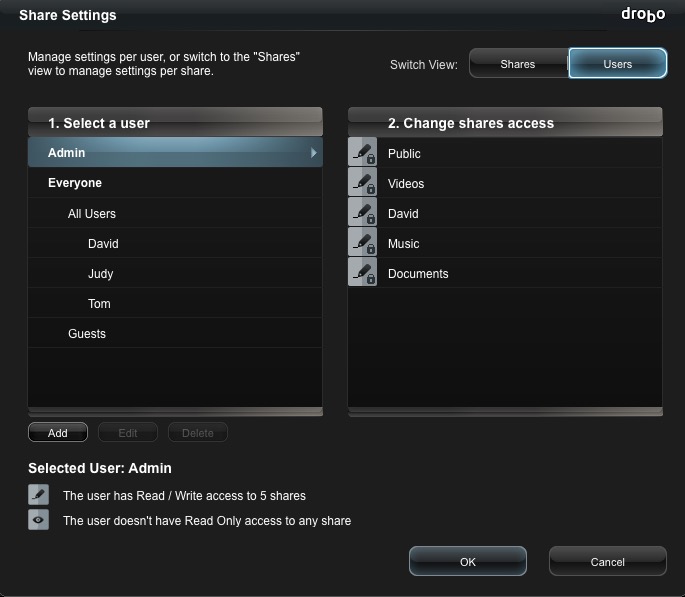
User management is handled from the same screen by selecting the User Button at the top. Doing so puts the users on the left panel and the Shares on the right. Selecting a User displays the Shares they have access to and you can select the same Read-Only or Read-Write access on a Share-by-Share basis.
In the end, this is no different than what needs to be done for any other NAS unit but we think even an average user will have no problem being a system administrator for the Drobo 5N2.
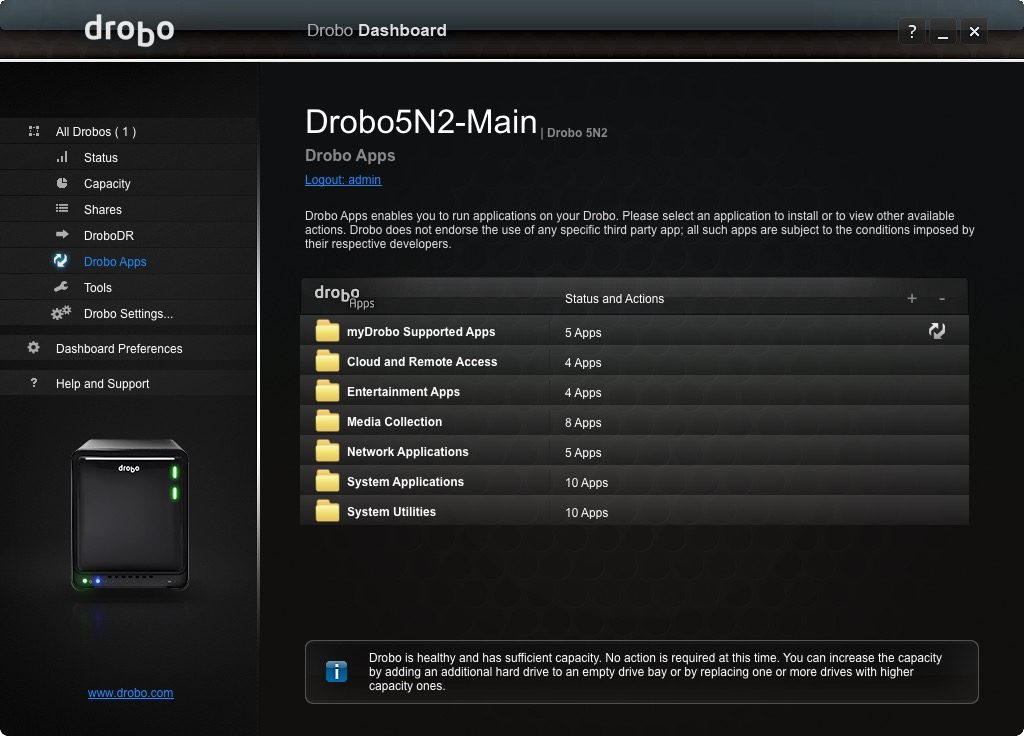
Like the other NAS providers we have tested, Drobo offers a variety of application that can be used to enhance the overall functionality of the Drobo 5N2. At last count, Drobo offered 46 apps in the following categories.
- myDrobo Supported Apps
- Cloud and remote Access
- Entertainment
- Media Collection
- Network Applications
- System Applications
- System Utilities
Some system application like Apache and MySQL seem to be installed and run by default. Others, like myDrobo, DroboAccess and DroboPix, all of which allow for remote access to your Drobo, will probably be the first apps you want to install and use.
While it is near impossible to say which NAS manufacturer provides the best apps, we feel confident in saying that the app selection provided by Drobo is on par with all of the other NAS offerings and are sure to meet your needs for just about anything you would want to do.
The Tools, Drobo Settings and Dashboard Preferences section of the Drobo Dashboard provide general settings and adjustments to help manage your Drobo and the dashboard app.
Drobo 5N2 – Remote Access
One of the main reasons that NAS units have become so popular is the ability to access your files remotely. Services like Google Drive, Dropbox and Apple iCloud all provide free accounts but they all come with fairly limited amounts of storage. And while all of these cloud services have some way of keeping certain folders in sync automatically, it seems to never fail that the one file you need is the one that you forgot to put in the sync folder.
Having your own NAS eliminates all of those problems. Everything that is stored on your NAS is instantly available remotely. There are no file size limits or storage restrictions, and with no monthly fees, you will essentially pay for your own NAS in a short period of time.
Setting up remote access to the Drobo was very easy. We installed the myDrobo app and the DroboAccess app on our Drobo 5N2. You then need to create an account for the myDrobo web site, which is done right inside the apps. Drobo takes care of the rest.
We found the set-up and registration process to be very straight forward and had our mobile access set up in a few minutes.
Once set up, you access your Drobo remotely by going to the URL you set up on the myDrobo web site from any browser on your desktop or iOS device.
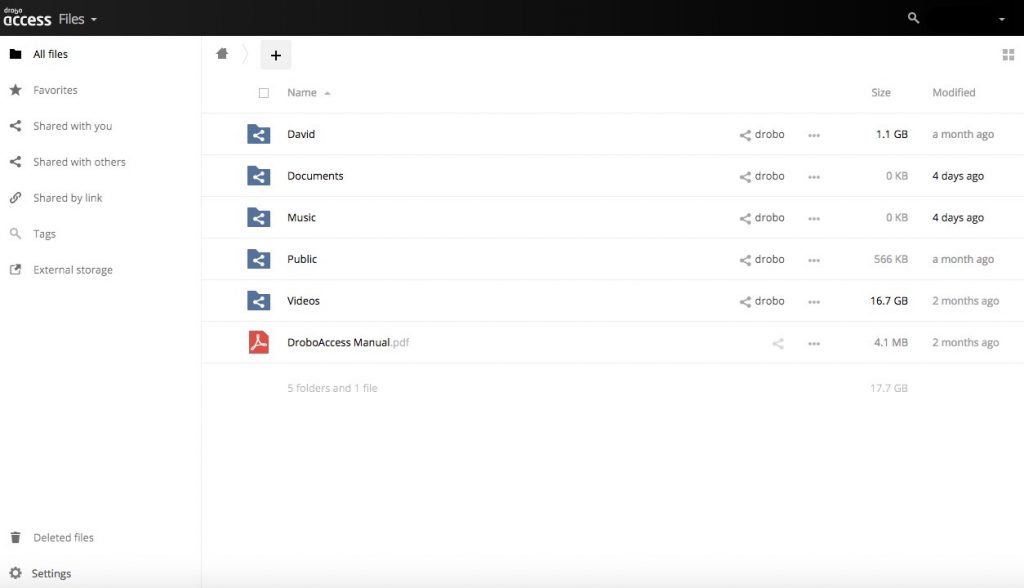
On the desktop, the myDrobo website has a clean and easy to understand user interface. Folders are well displayed along with all of the options for file management. Access rights to folders mirror the access granted on the Drobo itself.
Files are easily uploaded by a simple drag and drop from your Mac and sharing files is just as easy. Files to be shared on other Drobo Access domains can be automatically shared by putting in the Drobo Access domain in the appropriate box. For everyone else, you can create a web link with a single click and send the address by email or iMessage. You also can password protect the file and set an expiration on the link.
Drobo also makes a mobile app for the iPhone which provide for easy file management or you can use the same Drobo Access web site on your mobile browser. We have tried both the app and the mobile browser and found them to be equally easy to use.
The other mobile app we installed is the Drobo Pix app. This app automatically upload photos on your iPhone or iPad to your Drobo. When the app is opened, it automatically knows which photos are new and begins the upload.
We have tried similar apps from other NAS manufacturers and while they all basically work the same, the Drobo Pix app is one of the fastest we have seen. The app does require a Wi-Fi connection but we like that as it prevents unintended use of your data plan.
DroboDR
As we have said many times before, any data that you don’t want to lose, needs to be backed up. (Read our article on backup strategy here.) Many people make the mistake of thinking that a NAS device qualifies as a backup strategy because the data is saved to two different disks. That is not correct since damage to the hardware holding the disks could render your data unrecoverable.
Every NAS we have tested has at least one form of disaster recovery built-in and Drobo is no exception.
DroboDR allows you to duplicate your Drobo 5N2 to another unit that is connected to your local network or even to an off-site location using a VPN connection between the Drobo units.
Like most things Drobo, set-up of the DroboDR process was quick and easy. But be warned, using DroboDR is not inexpensive. To use the DroboDR process, you need a second Drobo 5N2.
We won’t go through all of the details here other than to say you set your primary Drobo 5N2 as the source unit and the second Drobo 5N2 as the target. Once you provide the appropriate log-in credentials, the backup pretty much takes care of itself.
The DroboDR process not only backs up your data but also the User Accounts and Drobo settings. While being used as a DroboDR target device, the Drobo 5N2 is locked down so you cannot add data or users to it directly. However, in the event of a disaster to your primary unit, you can disable the DroboDR function on the target unit and all of the users, data, etc. become available so you can be back up and running in a matter of minutes.
The DroboDR process is the closest thing to a hot-swappable server we have seen from any of the other NAS units we have reviewed so far.
For more details about the DroboDR function, check out their online manual here.
The Bottom Line
Whether you are interested in direct attached storage like the Drobo 5D or a networked device like the Drobo 5N2, you will find the same user friendly hardware and software that has made Drobo famous.
When we reviewed the Drobo 5D, we were impressed with how easy it was to get it up and running and our experience with the Drobo 5N2 was no different. Although we had a few minor issues in the beginning, we consider that unusual.
Drobo’s no tools required disk installation, coupled with the easy to understand indicators and the unified Drobo Dashboard would allow even the most inexperienced user to be comfortable installing one and being the administrator.
We think the Drobo 5N2 is geared towards the home or SMB user. The Drobo Dashboard does not have some of the more granular controls we have seen from other NAS providers but we often think many of those features are rarely, if ever, used in the home of SMB environment.
We are disappointed that the Drobo 5N2 does not have a USB connection on it or that the Drobo Dashboard does not provide an alternate backup mode since we would have loved to use our Drobo 5D as a local back-up of the 5N2 data. That said, the ability to convert the DroboDR target device to your main NAS in a matter of minutes is hard to find fault with.
The Drobo 5N2 is available in a diskless configuration or with various hard drives preinstalled and is available from Amazon.
We would like to thank the folks at Drobo for providing the Drobo 5N2 units for our testing.
If you liked this article, please consider sharing it with your friends and leaving a comment below.
Also, don’t forget to “Like” us on Facebook, “Follow Us” on Twitter and add the Apple Tech Talk channel to your Apple News app.
Apple Tech Talker

Leave a Comment
You must be logged in to post a comment.