
Every so often, a product comes along that makes you wonder how you ever got along without it. Such is the case with the D-Link Wi-Fi Water Sensor (Model DCH-S160). This tiny unit does just one thing, detect water where there shouldn’t be any, and it does it well.
Apple Tech Talk Scorecard
| Pros | Cons |
| Simple Set-up | Don’t rely on the audio alarm |
| Integrates with IFTTT.com | |
| Push Notification to your iPhone |
D-Link Wi-Fi Water Sensor – Set-up
 In the box is the main unit that plugs into any standard 110V AC outlet, the 1.6 foot water sensor cable which uses a standard RJ11, four wire telephone jack, a 3.3 foot RJ11 extension cable, a package of adhesive backed cable clips in case you want to fasten the cable along a wall or baseboard, a set-up card and a GPL License pamphlet.
The sensor until itself is pretty simple in design. There is the RJ11 jack on the bottom as well as a small LED indicator, a WPS button and a reset hole, all on the side of the sensor.
Set-up of the D-Link Wi-Fi Water Sensor is so simple that no separate Quick Start Guide is needed. There are only a few steps and they are all on the blue set-up card included in the box.
The first think you need to do is download the free, mydlink Home app from the iTunes App Store. Once installed on you iPhone, it will guide you through the set-up process.
If you don’t already have a mydlink account set-up, you will be asked to create a new (free) account which only takes a minute, Since we previously tested the D-Link DCS-2630L Wi-Fi Camera (see our review here), we already had an account set up and just needed to log in with our existing User ID and Password. Once logged in, we tapped on the Add a new Device option.
The obvious first step is to connect the water sensor cable to the main unit and then plug the D-Link Wi-Fi Water Sensor into an AC outlet near the area where you want to detect water. For our test we used an outlet next to a bathroom sink and let the sensor fall just below the top edge, as if to detect an overflow situation.
When the sensor is connect to AC, the D-Link logo on the front blinks a bright red along with the small LED indicator on the side of the unit. If your router support WPS you just push the button on the side of the sensor and it will join the sensor to your network. Since our Airport Extreme Base Station (read our review here), does not support WPS, we had to go through the extra manual steps.
As instructed by the app, we opened the Settings on our iPhone and selected the SSID listed on the D-Link Wi-Fi Water Sensor set-up card and then returned to the mydlink app. It took a minute or two for the sensor to connect to the phone but once it did we were then instructed to return to the iPhone settings and this time, select our original network. Again, it took only a minute or two for the app to acknowledge that the sensor was now connected to our network.
With the sensor now configured and attached to our network, the app provided options to set a unique name for the sensor, which comes in handy if you have more than one, and to send in app notifications of water detection by the identified sensor. There are only a couple of basic options but the app also prompts you to connect to the IFTTT.com (If This Than That) web site where there is already a dedicated channel for the D-Link Wi-Fi Water Sensor, which gives more options for notifications.
That’s it! Set-up is complete.
D-Link Wi-Fi Water Sensor – Test Results
To simulate an unintended water event we closed off the sink drain and let the water run. When the water level hit the tip of the sensor cable the sensor activated which means the D-Link logo on the front of the sensor flashed red, a low chirp was emitted from the unit and almost instantly, we received a message on our iPhone that water has been detected.
For another test we wondered just how sensitive the sensor cable was and also wanted to see what happens if we decided to move the sensor to a new location.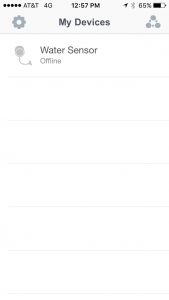
As soon as we unplugged the sensor, the app reported that it was off line. While not the intent of this device, a properly configured IFTTT channel could also act as a power failure notification. That’s important to know if you have a sump pump on your property and a loss of power could ultimately lead to additional water damage.
We plugged the D-Link W-Fi- Water Sensor into a new location and it was again recognized by our network with no reconfiguration required. This time, we put a few drops of water on our fingers and grabbed the end of the sensor cable. We were surprised at how quickly the sensor recognized the moisture and sent out a notification. As soon as we let go of the cable end, the notifications stopped. While probably not part of the original design, this seems to be a good way to avoid reacting to a false positive. While a minor spill may only cause a momentary alarm, a longer notification is a sure sign that there is an issue that needs investigation.
Our only complaint (if you can call it that) about the D-Link Wi-Fi Water Sensor is that the built-in alarm has very limited volume. We were standing right next to it when it went off and felt it was not nearly loud enough to be heard from any sort of distance. If you are a sound sleeper and the alarm went off in the middle of the night, we question if it would wake you. If it is at the other end of your house or on a different floor, it would be even worse.
Fortunately, D-Link has a solution for that with their W-Fi Siren (Model # DCH-S220). This is a separate unit that can be plugged into an AC outlet in a different location, as long as it is still on your local network, and will sound when the D-Link Wi-Fi Water Sensor, (or many of the other D-Link sensor products), detects an activity. We expect to have one of the D-Link Siren units in the near future and will let you know how it works, so stay tuned.
D-Link Wi-Fi Water Sensor – Applications
Studies have shown that the average person is ten times more likely to have damage in their home from water than from fire. Just think about all of the places in your home that have the potential to be damaged by a sudden leak. Here are just a few examples.
- Washing Machines
- Dishwashers
- Water Heaters
- Furnaces that heat with hot water
- Refrigerator Ice Makers
- Clogged Air Conditioner Condensation Hoses
- Overflowing Sump Pumps
- Overflowing toilets, sinks and bathtubs
To be clear, we are not suggesting that the D-Link Wi-Fi Water Sensor or any similar device is a substitute for regular inspection and maintenance of your home appliances and systems but because a hose can burst, or a leak can occur at any time, without warning, having the D-Link Water Sensor strategically located in your home can potentially save you from disaster.
The Bottom Line
You should almost think of the D-Link Water Sensor as an extension of your Homeowners insurance policy. It’s something you buy but hope you never have to use. But unlike your insurance policy, you only pay for the D-Link Water Sensor once, since there are no monthly fees to use it. Like alarm systems and smoke detectors, we could see an insurance company offering a discount if you have one or more D-Link Wi-Fi Water Sensors in your home. We could even see an enterprising insurance agent offering to give their customers a free D-Link Wi-Fi Water Sensor when they sell a new policy.
As the Internet of Things continues to expand, there will be more and more opportunities to monitor your home without the need to subscribe to expensive monthly monitoring services. While those services have their place, it’s nice to know that products like the D-Link Wi-Fi Water Sensor and its companion devices provide an alternative that give you piece of mind without breaking the bank.
The D-Link Wi-Fi Water Sensor has a MSRP of $69.99 but is available for a discount at Amazon. The optional D-Link Wi-Fi Siren has an MSRP of $49.99 and is also available from Amazon.
We wish to thank our friends at D-Link for providing a D-Link Wi-Fi Water Sensor for our evaluation.
If you liked this article, please consider sharing it with your friends and leaving a comment below.
Also, don’t forget to “Like” us on Facebook and “Follow Us” on Twitter.
APPLE TECH TALKER

Leave a Comment
You must be logged in to post a comment.