
In Part 1 of our review of the Netgear ReadyNAS RN202, we reviewed the hardware and provided an overview of the ReadyNAS OS 6 operating system. If you missed that review, you can see it here.
Since then, we’ve had an opportunity to put the RN202 through its paces and while we were generally pleased with its performance, we noticed some opportunities for improvement that we’ll discuss below.
Apple Tech Talk Scorecard
| Pros | Cons |
| Solid and feature rich performance | ReadyNAS Remote vs. ReadyCloud is confusing |
| ReadyCloud app is easy to use | |
| PLEX server performed well |
ReadyNAS RN202 Test Results
As a file server on our network the RN202 did everything we needed it to do. Shared volumes are easily available from the Finder and files can be moved onto the server with a simple drag and drop. With the proper security permissions, a user can add shared folders and add additional folders to their private Home share to build whatever directory structure suits them.
To get things started we loaded some data onto the RN202. We copied 380 iPhone quality photos and 1 iPhone video from our MacBook Pro onto the RN202. The total copy time was right around 13 minutes. We also copied 7.31 GB of HD quality video files and that took 30 minutes 39 seconds. These times probably won’t win any speed awards but they did involve wireless connections that would have certainly slowed things down. In everyday use, we found the response of the RN202 to be completely acceptable.
The ReadyNAS RN202 has a built-in DLNA server that supports just about any multimedia file format you can imagine including mp3, m4a and aac for music, jpeg for photos and mp4, mpeg, mov and m4p for video. This is only a partial list.
Using just the DLNA server, we were able to stream videos to our LG TV that uses a proprietary USB Dongle to connect to our Wi-Fi network. The videos played perfectly but the file listing was displayed multiple times, often filling more than one screen. The 4 video files in the Video folder took up 19 directory pages on the LG TV with each listing playing the video file equally well.
Following that, we installed the Plex application available directly from the ReadyNAS app store. The Plex application downloaded and self installed in a matter of minutes. Activating the Plex server in the ReadyNAS admin panel presented an additional option on the LG’s video selection panel. Even with Plex running, the DLNA selection showed the duplicated titles but the Plex option showed each title only once and the video again played without issue. We can’t really tell if the duplicated titles is an issue with the LG software or the RN202 but we can say that we have never seen that behavior in the past. In any case, using Plex, we had no issue so we won’t dwell on that minor hiccup.
The built-in iTunes server was less successful. While our iTunes application immediately recognized the Music folder on the RN202 as a library location, the music files in that folder were not presented as content.
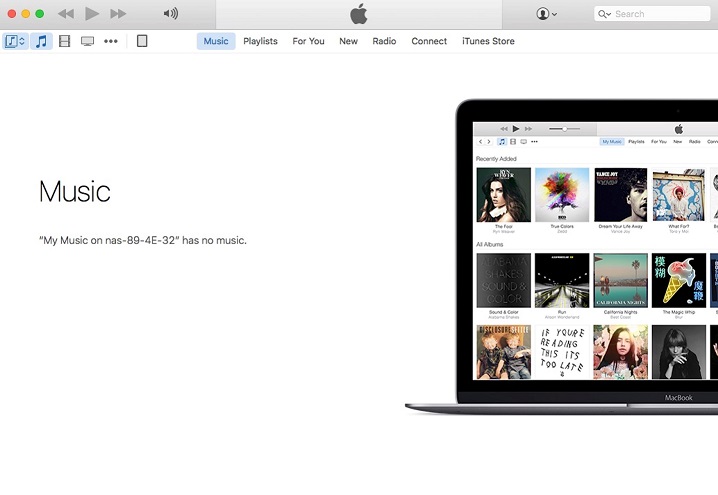
There was no question that the music files were in the ReadyNAS Music folder and we tried several variations including trying to create a new Music Library in iTunes but that didn’t work either.

We even made several attempts to reload the music files in different ways, including importing them back into the music folder right from the iTunes app, but we were never able to see them, let alone get them to play. We suspect we are missing something simple and if we figure out what we are doing wrong, we’ll post an update.
We connected a WD 3TB MyBook external hard drive to act as an outboard back-up for our data. We formatted the drive using the RN202 Format function and set up a job to back up the server each morning around 1:00 AM. We liked the fact that the user has the option to create multiple back-up jobs that can get very granular as to what it backs up and when. We can see this being a real benefit as the size and variety of your data volume grows. You may not want or need every share on your volume backed up every night. You can also set up the system to send an email notification at the conclusion of the back-up and can select being notified of just error conditions or everything. We chose to get a message at the completion of every back-up but having not had any issues in the weeks that we have been testing the RN202, we would be comfortable changing that to errors only.
Sharing files with anyone who is not a registered ReadyNAS user is very easy. Just right click on the file you want to share and a dialog box opens where you enter the email addresses you want to share the file with. You then have the ability to set an expiration on the link that is sent. Expirations can be based on a specific date or number of downloads. The addressees receive an email a short time later and clicking on the link starts an immediate download of the file.
The ReadyNAS OS sends a message to the original sender to confirm that the file has been downloaded. While this feature can be turned off we think it’s a nice touch and avoids you guessing if the file got to its intended destination.
There is a photo application that can also be added to the RN202 which acts like the Mac or iOS Photos application. In addition to allowing a user to view their photos in an album format, you can invite others (even non-RN202 users) to view the photos. This is a nice feature if you have family and friends that you want to share photo memories with. Links to albums are sent via email and the recipient gets a cute postcard stationary format inviting them to view your photos.
We also liked the ability to upload photos from our iPhone Camera Roll directly into the RN202 from anywhere there is Wi-Fi. Unlike some of the photo-syncing services like iCloud and Google Photos, deleting the photo from your phone does not delete it from the RN202. This comes in very handy if you are running low on storage space on your phone and need to delete some photos so you can take more.
Netgear ReadyCLOUD
ReadyCloud seems to be the primary means of accessing your data when you are remote. Going to the web site: https://readycloud.netgear.com (which is the same web site you use to set up your ReadyNAS), allows you to log in to your personal account.
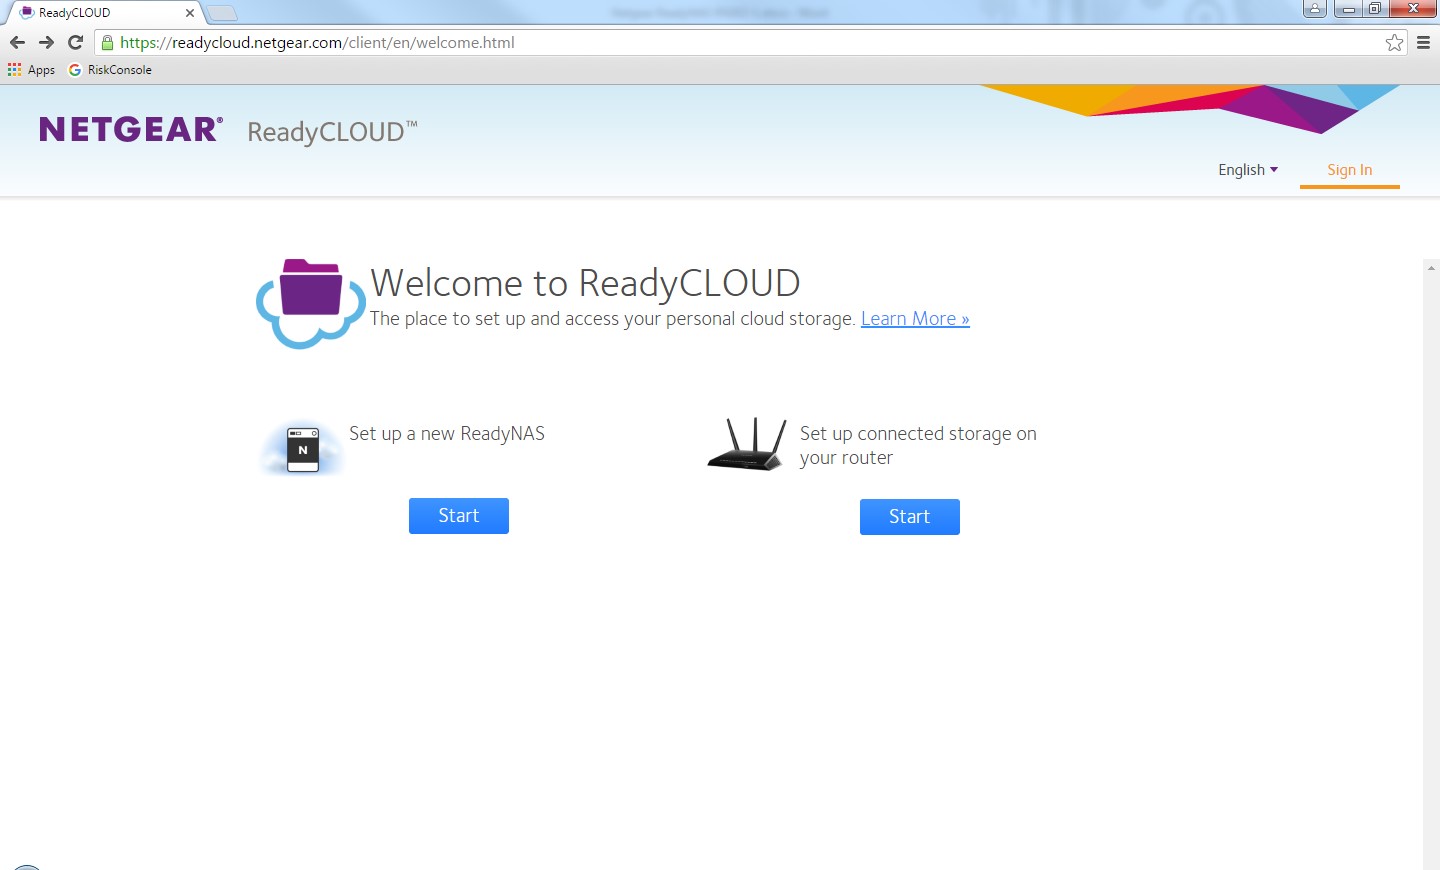
We certainly understand having a single web site to set up and then access your ReadyNAS but upon our first time going to the site after the set-up was complete, it took us a minute to realize that we could also log into our account from this page. Maybe it’s just us but the design of the web page naturally draws your attention to the big blue buttons on the center of the page. Our first expectation was to look for a blue button to access our existing account. The orange “Sign In” at the top of the screen doesn’t seem intuitive. We certainly don’t hold ourselves out to be experts in UI (User Interface) design but perhaps the folks at Netgear should take a look at the layout of this page.
Once logged in, we saw all of the shared folders and our private Home directory and could do pretty much everything we could do when on our local network. Files can be uploaded and downloaded and new folders can be created. The only thing you can’t do is perform any administrator functions. Although clicking on the Manage option in the ReadyCloud site presents you with the Admin link, clicking on it brings up a message that says the Admin page can only be accessed when you are on the same network as your device. We also found we were not able to log in to ReadyCloud using our admin credentials.
Without the ability to access Admin functions, we had no way to add a new user to the system while away from our network. This restriction certainly lends itself to better security overall since it seems impossible to take control of the RN202 unless you are on the local network but could be an inconvenience for anyone acting as an administrator for a home or small office unit and is rarely on-site. We’re not really sure if this has much impact on a day-to-day basis and we would not suggest that feature is a reason not to consider the ReadyNAS line and don’t view it a negative in our review.
Netgear also provides an application, which can be downloaded from their website that installs on your Mac. The app puts a small icon in your menu bar and allows you to access all of the ReadyCloud functions without the need to go through the website. We liked that this sits on the menu bar and is out of the way unless and until you want to use it. Like the web site, the ReadyCloud app for Mac has a link for Admin access and since this time you are on your local network, you can sign in directly from the app.
In addition to ReadyCloud, ReadyNAS OS 6 has a similar service that controls access when you are away from your local network, called ReadyNAS Remote. There are even two separate apps in the App Store for your iOS device with those two names. We activated both services and installed both apps on our iPhone and we don’t really see what the difference is between them.
Regarding web access, whether on your local network or remote, going to readynas.netgear.com brings up a web page that says:
It works!
This is the default web page for this server.
The web server software is running but no content has been added, yet.
We’re not really sure what this means or why we get the message before we even provide our log in credentials.
Going through the ReadyNAS Remote iOS app brings you into the shares set up on the RN202 and basically duplicates all of the functions available on the ReadyCloud app. But again, there is no way to sign in as an administrator.
The ReadyCloud app on our iPhone performed well but like the web based ReadyCloud access, provided no way to be an administrator.
In trying to figure this out we did some on line research and it seems that ReadyNAS Remote may be a VPN connection into the ReadyNAS server. Another article we read seems to suggest that ReadyCloud may be the newer version of ReadyNAS Remote. If that is true, Netgear would be well served to pull the ReadyNAS Remote app from the App Store or at least better describe what it is and how it is different from ReadyCloud.
One of the main reasons people want their own NAS server is to create their own personal DropBox type application. It seems to make much more sense to invest in a piece of hardware, like the ReadyNAS RN202, which can grow as your needs grow, then to pay a recurring fee to any of the many cloud services that currently exist.
We spent a fair amount of time looking on the Neatgear website, in the ReadyNAS User Guide and other locations and found numerous references to services with the names of ReadySYNC and ReadyDROP which seemed to be what we were looking for. There is even a reference to ReadyDROP in the sample ReadyNAS OS screen shot we showed in Part 1 of our review. But all of those references seemed to be for older (or different) versions of ReadyNAS hardware. Any instructions we found on line did not match up to the screen options we found in ReadyNAS OS 6. Finally, we reached out to our contact at Netgear who provided a link to a YouTube video that explains the syncing options available. Admittedly, even after we watched the video we had some confusion and had to go back and watch it a couple of more times before we figured out what to do.
What we ultimately found is that ReadyNAS provides two separate functions. The first is a one-way sync function that allows you to select a folder on your Mac and have it synchronized to your ReadyNAS in real time. This is a nice was to ensure that your most critical data is constantly backed up from your computer.
The other function is a more familiar two-way sync between your Mac and the ReadyNAS. Once we figured out how to set this up it took less than a minute and in our brief test, worked flawlessly. Files we placed in the designated folder on our Mac were almost instantly synced with the corresponding folder on the RN202 and a file we placed in the RN202 folder was also on our Mac in no time.
Both of these services worked well but as we have seen before, seem to be lacking in documentation.
ReadyNAS X-RAID
Another reasons people should consider a multi-drive device like the ReadyNAS RN202, is for the data protection that RAID provides. We decided to put the ReadyNAS X-RAID protection to the test.
With the RN202 fully functional, we pulled one of the drives out of the server, in order to simulate a sudden loss of a drive. We immediately received an email from the system alerting us that the drive had been removed. We were impressed that the system could distinguish between a drive failure and a physical removal. We then received another email alerting us that the system heath had changed from Redundant to Degraded and we saw that the LED for the missing drive was blinking. If we hadn’t created this situation, we wouldn’t have any problem figuring out exactly what was happening.
We then replaced the drive back into the server. Again we got an email advising that a drive had been installed in the server, followed by an email advising that resyncing had started for the data volume. Even though we didn’t erase the drive contents, the RN202 did a complete rebuild of the entire drive. At the conclusion of the resync, the system sent two more emails to advise the resync was complete and that the system status had changed from Degraded to Redundant.
The resync of data ran overnight and spanned the time that the nightly back-up of the server is usually completed. We were impressed to see that even in a degraded condition, with a resync of data in progress, the RN202 launched and successfully completed the scheduled back-up.
Even though we only had a relatively small amount of data on the drive (about 200GB) the resync process took about 14 hours. We’re not sure if having larger drives and/or more data on the drives would extend that process even longer but it’s important to point out that at no time during the resync process did we lose our ability to access the server as we normally do and there was no loss of data in the process.
Even if you didn’t care about all of the other features that the RN202 has to offer, the data protection that comes from the dual drives and X-RAID configuration is reason enough to add the ReadyNAS RN202 to your home or office.
Netgear provides a three year warranty on the ReadyNAS hardware and maintains an on-line support site with an extensive library of articles to help you solve many problems. There is also a robust User Community on the Netgear site with a well-educated user base that is ready to help both new and experienced users.
The Bottom Line
All in all, we like the Netgear ReadyNAS RN202. Netgear has been making quality products for a long time and the RN202 is no exception as evidenced by the three year warranty on the hardware. The hardware is well designed and the operating system is user friendly. The ReadyNAS OS 6 is very stable and does what you need it to do. The remote access is somewhat confusing with the two remote services. Overall, we give the Netgear ReadyNAS a very high score, with our only comment being that their instructions and documentation needs some attention.
The Netgear ReadyNAS RN202 is a solid NAS device and well worth your consideration since it provides a robust NAS experience, with top-of-the-line data protection, at a very attractive price.
The diskless model of the Netgear ReadyNAS RN202 has a MSRP of $249.99 but is available from Amazon at a deep discount using the link below.
We wish to thank the folks at Netgear for providing us with a ReadyNAS RN202 and the Seagate disk drives for our review.
If you liked this article, please consider sharing it with your friends and leaving a comment below.
Also, don’t forget to “Like” us on Facebook and “Follow Us” on Twitter.
APPLE TECH TALKER

Leave a Comment
You must be logged in to post a comment.