
For most Mac users, Time Machine is the go-to application to recover a deleted file. But there are going to be times when your Time Machine drive is not available and you need to recover a deleted photo, movie or audio file. For those time, Stellar Photo Recovery may be a good option.
Disclosure: Apple Tech Talk participates in various affiliate marketing programs and may receive compensation if you purchase a product through one of our links, and/or in the form of product donations from the companies whose products we review . Unless otherwise specifically stated, Apple Tech Talk does not receive any other compensation for its reviews. The opinions expressed are based solely on our independent testing, are our own and are not shared with anyone prior to release on our site.
Apple Tech Talk Scorecard
| Pros | Cons |
| Easy to use GUI | Must disable SIP to use |
| Multiple versions available | May be difficult to find the file you want |
Stellar Photo Recovery for Mac – Overview
As the name implies, Stellar Photo Recovery is an application to help you recover photo files that may have been previously deleted from your internal hard drive, external hard drive, SD card, etc.
But the name doesn’t really go far enough. As we will discuss in a moment, Stellar Photo Recover for Mac also has the ability to recover audio and video files that have been deleted from your devices.
The software supports a variety of hard drive formats including APFS, HFS+, NTFS, exFAT and FAT32.
Stellar Photo Recovery for Mac – Installation and First Use
To test Stellar Photo Recovery for Mac, we downloaded a copy from the Stellar web site. It downloads as a standard .dmg file and after mounting the installer, dragged the application icon onto the Applications folder in the installer window. After a few seconds, the application was ready to go.
Upon launching Stellar Photo Recovery for Mac the first time, we were presented with a warning box indicating that the application “wanted to make changes” and asking for our Mac password, which we entered. We have since seen that we get this same message every time we open the application. Given that, we would have appreciated Stellar telling us what changes the application is trying to make. After a brief initialization process, you are presented with a screen to select the file types you want to recover.
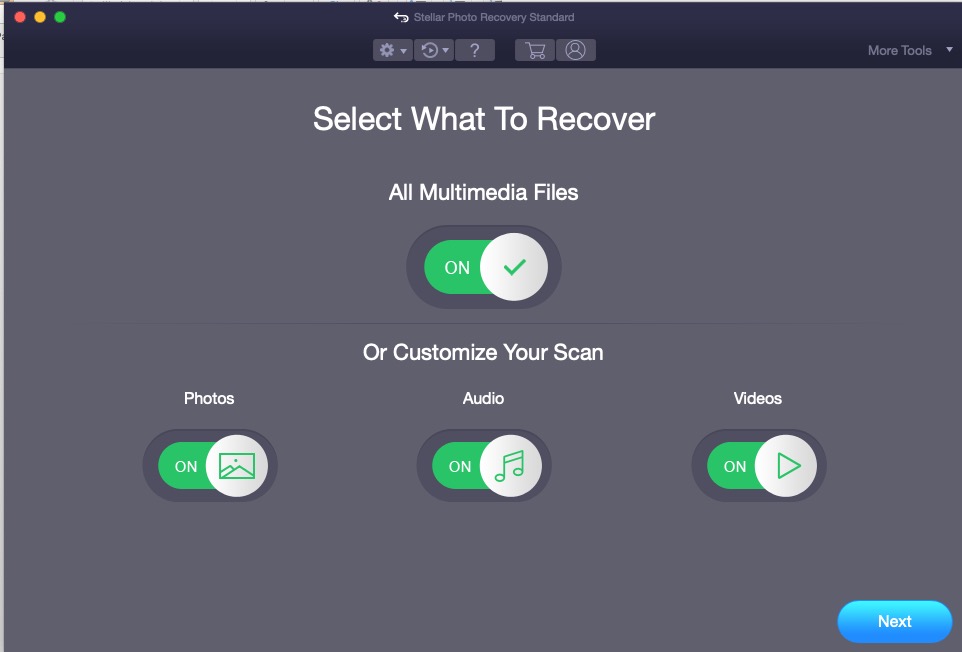
Next was the screen to select the media you want to scan for the recovery.
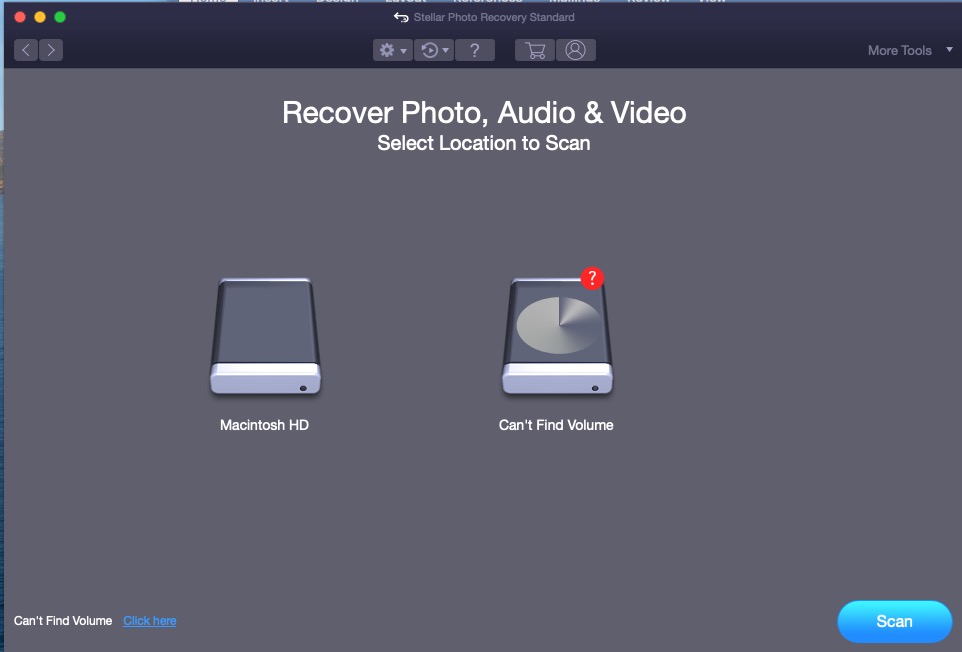
We were presented with two choices. As we assumed the Can’t Find Volume was our attached Time Machine drive, the Macintosh HD drive was the obvious choice. We selected it and selected Scan.
Instead of the scan starting, we received this screen advising us to disable the System Integrity Protection (SIP) of macOS.
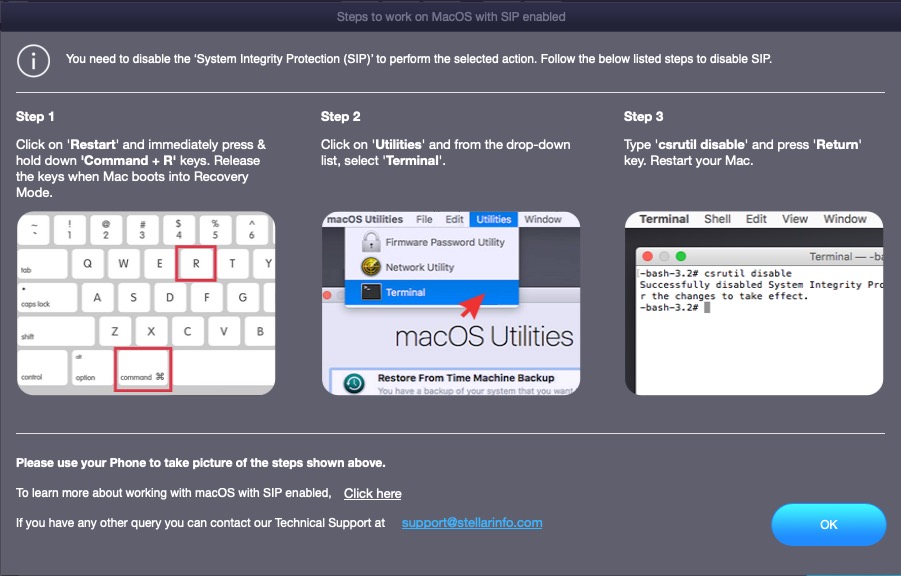
Clicking OK without taking further action just brought us back to the drive selection screen so we basically hit a dead end
What is System Integrity Protection?
Apple introduced System Integrity Protection in OS X El Capitan (and later). It is a technology that helps prevent potentially malicious software from modifying protected files and folders on your Mac. Here is some of what Apple has to say about System Integrity Protection.
“Before System Integrity Protection, the root user had no permission restrictions, so it could access any system folder or app on your Mac. Software obtained root-level access when you entered your administrator name and password to install the software. That allowed the software to modify or overwrite any system file or app.
System Integrity Protection includes protection for these parts of the system:
- /System
- /usr
- /bin
- /sbin
- /var
- Apps that are pre-installed with OS X
Paths and apps that third-party apps and installers can continue to write to include:
- /Applications
- /Library
- /usr/local
System Integrity Protection is designed to allow modification of these protected parts only by processes that are signed by Apple and have special entitlements to write to system files, such as Apple software updates and Apple installers. Apps that you download from the Mac App Store already work with System Integrity Protection. Other third-party software, if it conflicts with System Integrity Protection, might be set aside when you upgrade to OS X El Capitan or later.
System Integrity Protection also helps prevent software from selecting a startup disk. To select a startup disk, choose System Preferences from the Apple menu, then click Startup Disk. Or hold down the Option key while you restart, then choose from the list of startup disks.”
When you think about it, System Integrity Protection is part of what makes macOS, macOS, so we had to think long and hard about disabling it, but since there was no way to move forward without it, we followed the directions and disabled it.
Stellar Photo Recovery for Mac – Scanning Process and Results
With SIP disabled, we repeated the same steps as before. To our surprise, this time we had an additional drive to select from.

Our assumption is the drive labeled “Can’t Find Volume” is actually the logical drive created by macOS to hold the operating system and not one that we mortals should be touching under any circumstances. The fact that we could now see the Time Machine drive is a direct result of disabling SIP.
We again selected the Macintosh HD and this time started the scan process as expected. If you remember our previous review of Stellar Phoenix Mac Data Recovery Software (read or review here), this process will be very familiar as the screens and the process are almost identical.
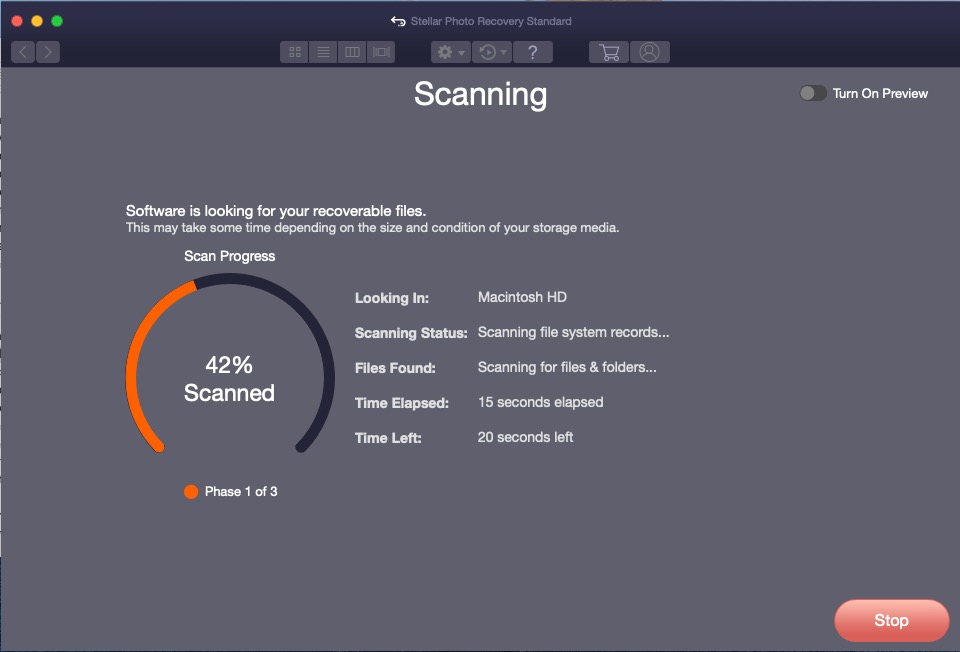
The software goes through a three step scanning process to identify the files on your drive.
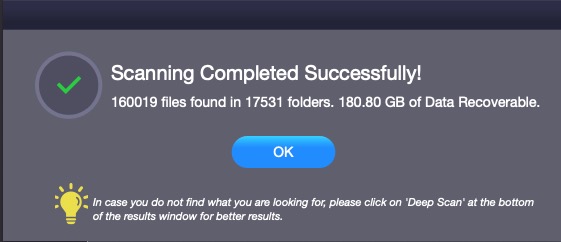
After only a couple of minutes, we received confirmation that the software found over 160,000 files and presented us with a screen to view what appeared to be a complete listing of every file on our hard drive. We had the choice to see a “Classic View” which is basically what you would see in a Finder window but included far more files, which are normally hidden, as well as a view by file type.

There was also a selection to see Deleted Files but to do this, we had to run a Deep Scan of our drive. While the process is the same, there is obviously a difference. For one thing, there were now four (4) phases to the scan and rather than taking a few minutes, the scan took much longer to complete.
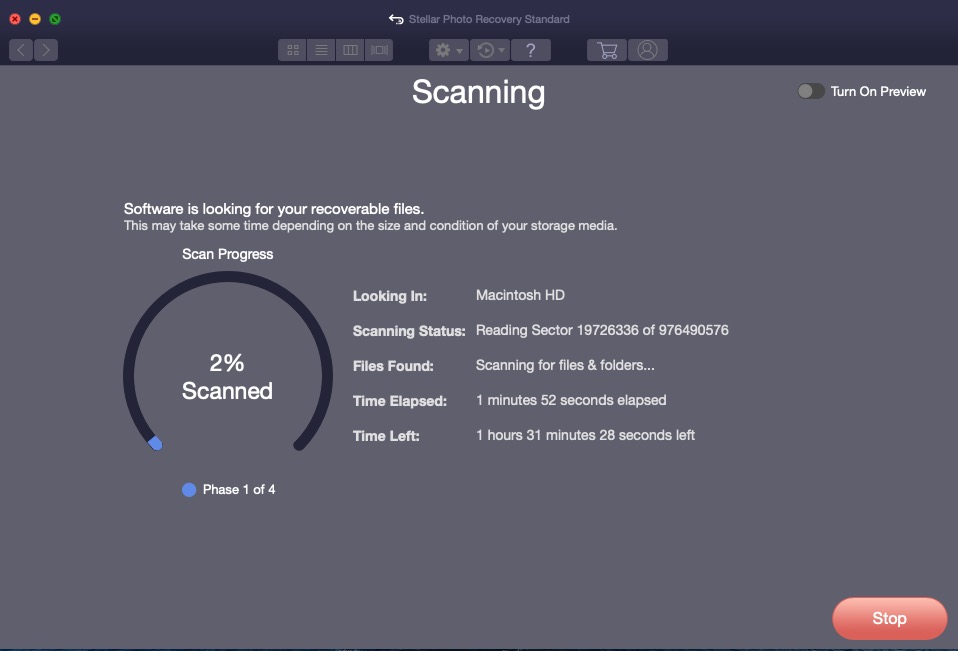
At one point, the application indicated that the scan was going to take almost two and a half hours to complete but the estimates constantly changed and in the end, I took just over one hour to scan our 500GB drive.
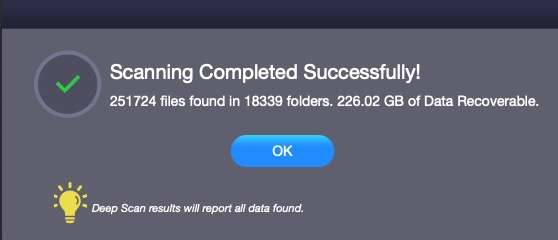
The completed Deep Scan had some interesting results.
Regular Scan Deep Scan Total Files 160,019 251,724 Total Folders 17,531 18,339 Total Data Recoverable 180.80GB 226.02GB
It’s clear that the deep scan accessed parts of the drive that were skipped during the original scan. With the Deep Scan completed, we were now presented with an additional list of “deleted” files that we could recover.
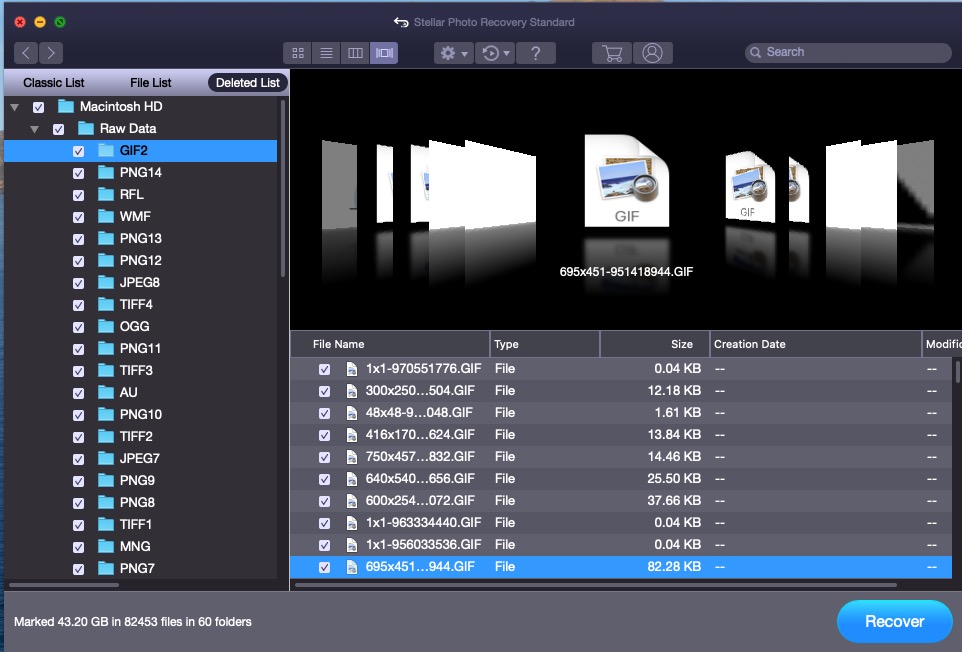
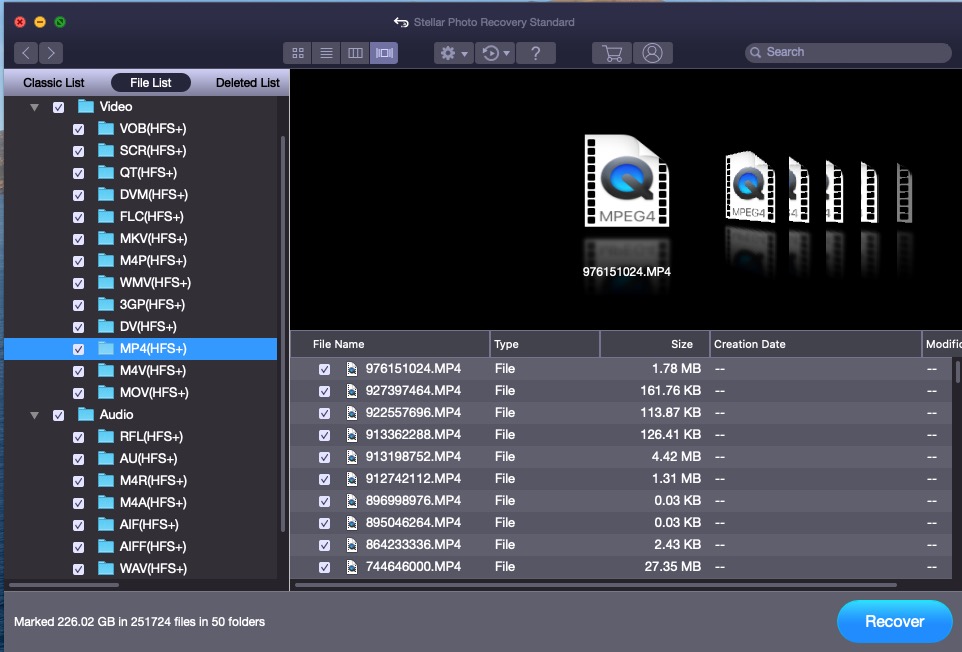
Organized by media type (Photos, Video, Audio) and then by file type, we viewed the files in Carousel view in hopes of finding an easy way to identify the files we might want to restore. Given the generic naming of the files and the hundreds of files to choose from, it could take a while to actually find the file you want to recover but if it is important enough, it is time well spent. There is also a “Preview” mode available which shows a thumbnail of the file before recovery and even allows you to open the file in the Preview application..
Recovery of the file is as simple as selecting the file(s) you want and clicking the Recover button.
Stellar Photo Recovery for Mac – One More Thing
In the Apple tradition, there is one more thing to mention.
We are not engineers, and cannot begin to understand exactly why System Integrity Protection has to be disabled in order for Stellar Photo Recovery for Mac to work. We trust that the folks at Stellar would only do it if it was absolutely necessary.
Given that Stellar Photo Recovery for Mac is not the type of application that you will use every day, we see little risk in disabling it for a short period of time so you can run the Stellar Photo Recovery for Mac application and recover what you need to.
That said, we also think turning off an important security service in the operating system should not be taken lightly and we strongly suggest that you re-enable SIP when you are done using Stellar Photo Recovery for Mac.
Stellar’s Response
After we initially published our article, Stellar responded in connection with our concerns about disabling System Integrity Protection. Their response is below.
“Stellar is the ONLY data recovery software that informs the customer that we need to disable System Integrity Protection(SIP)” and makes them do it consciously. According to Stellar, other data recovery competitors like Disk Drill, Wondershare, Easeus etc. disable the SIP automatically and DO NOT inform the customer. Stellar thinks that’s bad form because the SIP remains disabled even after the customer has done data recovery.”
The Bottom Line
Stellar Photo Recovery for Mac is one of those applications that you may only need once or twice but when you need it, you’ll be glad you have it.
The simple user interface makes it easy to use and while we had initial concerns about disabling SIP, we became comfortable knowing that it was only a temporary condition and could be turned back on as easily as it was turned off.
Stellar Photo Recovery for Mac has different versions available with additional feature added for a small additional cost.
Standard Professional Premium Recovers lost and deleted photos from all types of storage devices ✓ ✓ ✓ Recovery All Media Files with any extension ✓ ✓ ✓ Provides three types of previews i.e. Classic List File List and Deleted List ✓ ✓ ✓ Repairs Corrupt Photos – ✓ ✓ Repairs and Extracts Thumbnails – ✓ ✓ Repairs multiple corrupt Photos in one click – ✓ ✓ Repairs All Types of Video Files – – ✓ Repairs all added video files at once with a single click – – ✓ Provides Preview of Repaired Videos – – ✓
All versions of Stellar Photo Recovery for Mac are available for immediate download or as a disc from Amazon.
We would like to thank the folks at Stellar Data Recovery for providing a copy of Stellar Photo Recovery for Mac for our testing and review.
How do you protect your media from loss and how can you recover deleted files? Join the conversation and leave a comment below.
If you liked this article, please consider sharing it with your friends and leaving a comment below. Also, don’t forget to “Like” us on Facebook and add the Apple Tech Talk channel to your Apple News app.
Apple Tech Talker
This article was originally published on August 19, 2020. It was updated with a response from the manufacturer and republished on August 21, 2020.

Leave a Comment
You must be logged in to post a comment.